GraphHopper Directions API (1.0.0)
Download OpenAPI specification:Download
With the GraphHopper Directions API you can integrate A-to-B route planning, turn-by-turn navigation, route optimization, isochrone calculations, location clustering and other tools in your application.
The GraphHopper Directions API consists of the following RESTful web services:
Each API part has its own documentation. Jump to the desired API part and learn about the API through the given examples and tutorials.
You can also try all API parts without registration in our API explorer.
To speed up development and make coding easier, we offer a JavaScript client and a Java client.
Optimize Response Speed
Reuse SSL/TLS sessions
You should utilize the SSL session to speed up responses after the initial response or use a library that does this. E.g. for Java the OkHttp library automatically reuses SSL/TLS sessions and also the browser takes care of this automatically. For python you can use the
requestslibrary: first you create a session (session = requests.Session()) and then do requests only with this session instead of directly using "requests".Bandwidth reduction
If you create your own client, make sure it supports http/2 and gzipped responses for best speed. If you use the Matrix, the Route Optimization API or the Cluster API and want to solve large problems, we recommend you to reduce bandwidth by compressing your POST request and specifying the header as follows:
Content-Encoding: gzip. This will also avoid the HTTP 413 error "Request Entity Too Large".
If you have problems or questions, please read the following information:
To stay informed about the latest developments, you can
The default data source is OpenStreetMap and as an alternative we have also integrated TomTom.
Geographical Coverage
OpenStreetMap covers the whole world. If you want to see for yourself if we can provide data suitable for your region, please visit GraphHopper Maps. You can edit and modify OpenStreetMap data if you find that important information is missing, e.g. a weight limit for a bridge. Here is a beginner's guide that shows how to add data. If you have edited data, we usually consider your data after 1 week at the latest.
Standard Routing Profiles
The Routing, Matrix and Route Optimization APIs support the following profiles. But also see the section about customized profiles below the table.
| Name | Description | Restrictions | Icon |
|---|---|---|---|
| car | Car mode | car access, weight=2500kg, width=2m, height=2m |  |
| car_avoid_ferry | Car mode | like car that heavily penalizes ferries | |
| car_avoid_motorway | Car mode | like car that heavily penalizes motorways | |
| car_avoid_toll | Car mode | like car that heavily penalizes tolls | |
| small_truck | Small truck like a Mercedes Sprinter, Ford Transit or Iveco Daily | height=2.7m, width=2+0.28m, length=5.5m, weight=2080+1400 kg |  |
| truck | Truck like a MAN or Mercedes-Benz Actros | height=3.7m, width=2.6+0.34m, length=12m, weight=13000+13000 kg, hgv=yes, 3 Axes |  |
| scooter | Moped mode | Fast inner city, often used for food delivery, is able to ignore certain bollards, maximum speed of roughly 50km/h. weight=300kg, width=1m, height=2m |  |
| foot | Pedestrian or walking without dangerous SAC-scales | foot access |  |
| hike | Pedestrian or walking with priority for more beautiful hiking tours and potentially a bit longer than foot. Walking duration is influenced by elevation differences. |
foot access |  |
| bike | Trekking bike avoiding hills | bike access |  |
| mtb | Mountainbike | bike access |  |
| racingbike | Bike preferring roads | bike access |  |
Please note:
- the free package supports only the routing profiles
car,bikeorfoot - up to 3 different routing profiles can be used in a single request towards the Route Optimization API. The number of vehicles is unaffected and depends on your subscription.
- we offer custom routing profiles with different properties, different speed profiles or different access options. To find out more about custom profiles, see the documentation and contact us.
- a sophisticated
motorcycleprofile is available up on request. It is powered by the Kurviger Routing API and favors curves and slopes while avoiding cities and highways.
Customized Routing Profiles
You can also adjust the speeds, access options and much more by using customized routing profiles. We offer this for the Routing API (see the section about Custom Models). For interested customers we offer the Profiles API that can be used for matrix calculations and route optimiztion as well.
If you want to include traffic, you can purchase the TomTom Add-on. This Add-on only uses TomTom's road network and historical traffic information. Live traffic is not yet considered. If you are interested to learn how we consider traffic information, we recommend that you read this article.
Please note the following:
- Currently we only offer this for our Route Optimization API. Contact us if you would like to use it for the Matrix or Routing API.
- In addition to our terms, you need to accept TomTom's End User License Aggreement.
- We do not use TomTom's web services. We only use their data with our software.
Contact us if you want to buy this TomTom add-on.
Geographical Coverage
We offer
- Europe including Russia
- North, Central and South America
- Saudi Arabia and United Arab Emirates
- South Africa
- Southeast Asia
- Australia
Supported Vehicle Profiles
| Name | Description | Restrictions | Icon |
|---|---|---|---|
| car | Car mode | car access | |
| small_truck | Small truck like a Mercedes Sprinter, Ford Transit or Iveco Daily | height=2.7m, width=2+0.28m, length=5.5m, weight=2080+1400 kg | |
A custom model allows you to modify the default routing behavior of a vehicle profile by specifying a set of rules in JSON language.
There are three JSON properties to change a profile: priority, speed and distance_influence that are described in great detail in the next sections and you can get a quick overview in this example-driven blog post.
But first we will give an introductory example for each of these JSON properties. Let's start with speed:
{
  "speed": [{
    "if": "road_class == MOTORWAY",
    "limit_to": "90"
  }]
}
As you might have already guessed this limits the speed on motorways to 90km/h. Changing the speed will of course change the travel time, but at the same time this makes other road classes more likely as well, so you can use this model to avoid motorways.
You can immediately try this out in the Browser on GraphHopper Maps. GraphHopper Maps offers an interactive text editor to comfortably enter custom models. You can open it by pressing the "custom" button. It will check the syntax of your custom model and mark errors in red. You can press Ctrl+Space or Alt+Enter to retrieve auto-complete suggestions. Pressing Ctrl+Enter will send a routing request for the custom model you entered. To disable the custom model you click the "custom" button again.
In the second example we show how to avoid certain road classes without changing the travel time:
{
  "priority": [{
    "if": "road_class == LIVING_STREET || road_class == RESIDENTIAL || road_class == UNCLASSIFIED",
    "multiply_by": "0.1"
  }]
}
This example avoids certain smaller streets. View it in GraphHopper Maps.
The third example shows how to prefer shortest paths:
{
  "distance_influence": 200
}
View this example in GraphHopper Maps.
There is a fourth JSON property areas that allows you to define areas that can then be used in the if or else_if conditions for speed and priority.
Please read more about this and the other properties below and try some examples in
GraphHopper Maps with the help of
this blog post.
When using custom models you do not need to define rules that specify a speed for every road segment, but rather GraphHopper assumes a default speed. All you need to do is adjust this default speed to your use-case as you will always use the custom model in conjunction with a routing profile which is used to determine the default speed.
The custom model is a JSON object and the first property we will learn about here is the speed property. The speed
property's value is a list of conditional statements that modify the default speed. Every such statement consists of a
condition and an operation. The different statements are applied to the default speed from top to bottom, i.e.
statements that come later in the list are applied to the resulting value of previous operations. Each statement is only
executed if the corresponding condition applies for the current road segment. This will become more clear in the following
examples.
Currently the custom model language supports two operators:
multiply_bymultiplies the speed value with a given numberlimit_tolimits the speed value to a given number
if statements and the multiply_by operation
Let's start with a simple example using multiply_by:
{
  "speed": [
    {
      "if": "road_class == MOTORWAY",
      "multiply_by": "0.5"
    }
  ]
}
This custom model reduces the speed of every road segment for which the road_class attribute is MOTORWAY to
fifty percent of the default speed (the default speed is multiplied by 0.5). Again, the default speed is the speed
that GraphHopper would normally use for the profile's vehicle. Note the if clause which means that the operation
(multiply_by) is only applied if the condition road_class == MOTORWAY is fulfilled for the road segment under
consideration. The == indicates equality, i.e. the condition reads "the road_class equals MOTORWAY". If you're a bit
familiar with programming note that the condition (the value of the if key) is just a boolean condition in Java
language (other programming languages like C or JavaScript are very similar in this regard). A more complex condition
could look like this: road_class == PRIMARY || road_class == TERTIARY which uses the or
(||) operator and literally means "road_class equals PRIMARY or road_class equals TERTIARY".
There can be multiple such 'if statements' in the speed section, and they are evaluated from top to bottom:
{
  "speed": [
    {
      "if": "road_class == MOTORWAY",
      "multiply_by": "0.5"
    },
    {
      "if": "road_class == PRIMARY || road_environment == TUNNEL",
      "multiply_by": "0.7"
    }
  ]
}
In this example the default speed of road segments with road_class == MOTORWAY will be multiplied by 0.5, the default speed
of road segments with road_class == PRIMARY will be multiplied by 0.7 and for road segments with both road_class == MOTORWAY and
road_environment == TUNNEL the default speed will be multiplied first by 0.5 and then by 0.7. So overall the
default speed will be multiplied by 0.35. For road segments with road_class == PRIMARY and road_environment == TUNNEL we
only multiply by 0.7, even though both parts of the second condition apply. It only matters whether the road segment matches
the condition or not.
road_class and road_environment are road attributes of 'enum' type, i.e. their value can only be one of a fixed set of
values, like MOTORWAY for road_class.
Other road attributes like road_class_link are of boolean type. They can be used as conditions directly, for example:
{
  "speed": [
    {
      "if": "road_class_link",
      "multiply_by": "0.6"
    }
  ]
}
which means that for road segments with road_class_link==true the speed factor will be 0.6.
For attributes with numeric values, like max_width you should not use the == (equality) or != (
inequality) operators, but the numerical comparison operators "bigger" >, "bigger or equals" >=, "smaller" <, or
"smaller or equals" <=, e.g.:
{
  "speed": [
    {
      "if": "max_width < 2.5",
      "multiply_by": "0.8"
    }
  ]
}
which means that for all road segments with max_width smaller than 2.5m the speed is multiplied by 0.8.
The limit_to operation
Besides the multiply_by operator there is also the limit_to operator. As the name suggests limit_to limits the
current value to the given value. Take this example:
{
  "speed": [
    {
      "if": "road_class == MOTORWAY",
      "multiply_by": "0.8"
    },
    {
      "if": "surface == GRAVEL",
      "limit_to": "60"
    }
  ]
}
This implies that on all road segments with the GRAVEL value for surface the speed will be at most 60km/h,
regardless of the default speed and the previous rules. So for a road segment with road_class == MOTORWAY,
surface == GRAVEL and default speed 100 the first statement reduces the speed from 100 to 80 and the second
statement further reduces the speed from 80 to 60. If the road_class was PRIMARY and the default speed was 50
the first rule would not apply and the second rule would do nothing, because limiting 50 to 60 still yields 50.
A common use-case for the limit_to operation is the following pattern:
{
  "speed": [
    {
      "if": "true",
      "limit_to": "90"
    }
  ]
}
which means that the speed is limited to 90km/h for all road segments regardless of its properties. The condition
"true" is always fulfilled.
else and else_if statements
The else statement allows you to define that some operations should be applied if an road segment does not match a
condition. So this example:
{
  "speed": [
    {
      "if": "road_class == MOTORWAY",
      "multiply_by": "0.5"
    },
    {
      "else": "",
      "limit_to": "50"
    }
  ]
}
means that for all road segments with road_class == MOTORWAY we multiply the default speed by 0.5 and for all others we
limit the default speed to 50 (but never both).
In case you want to distinguish more than two cases (road segments that match or match not a condition) you can use else_if
statements which are only evaluated in case the previous if or else_if statement did not match:
{
  "speed": [
    {
      "if": "road_class == MOTORWAY",
      "multiply_by": "0.5"
    },
    {
      "else_if": "road_environment == TUNNEL",
      "limit_to": "70"
    },
    {
      "else": "",
      "multiply_by": "0.9"
    }
  ]
}
So if the first condition matches (road_class == MOTORWAY) the default speed is multiplied by 0.5, but the other two
statements are ignored. Only if the first statement does not match (e.g. road_class == PRIMARY) the second statement
is even considered and only if it matches (road_environment == TUNNEL) the default speed is limited to 70. The last
operation (multiply_by: "0.9") is only applied if both previous conditions did not match.
else and else_if statements always require a preceding if or else_if statement. However, there can be multiple
'blocks' of subsequent if/else_if/else statements in the list of rules for speed.
else_if is useful for example in case you have multiple multiply_by operations, but you do not want that the speed
gets reduced by all of them. For the following model
{
  "speed": [
    {
      "if": "road_class == MOTORWAY",
      "multiply_by": "0.5"
    },
    {
      "else_if": "road_environment == TUNNEL",
      "multiply_by": "0.8"
    }
  ]
}
only the first factor (0.5) will be applied even for road segments that fulfill both conditions.
You can not only modify the speed of road segments based on properties, like we saw in the previous examples, but you
can also modify the speed of road segments based on their location. To do this you need to first create and add some
areas to the areas section of the custom model. You can then use the name of these areas in the conditions of your
if/else/else_if statements.
In the following example we multiply the speed of all road segments in an area called custom1 with 0.7 and also limit it
to 50km/h. Note that each area's name needs to be prefixed with in_:
{
  "speed": [
    {
      "if": "in_custom1",
      "multiply_by": "0.7"
    },
    {
      "if": "in_custom1",
      "limit_to": "50"
    }
  ],
  "areas": {
    "type": "FeatureCollection",
    "features": [{
      "type": "Feature",
      "id": "custom1",
      "geometry": {
        "type": "Polygon",
        "coordinates": [
          [
            [
              1.525,
              42.511
            ],
            [
              1.510,
              42.503
            ],
            [
              1.531,
              42.495
            ],
            [
              1.542,
              42.505
            ],
            [
              1.525,
              42.511
            ]
          ]
        ]
      }
    }]
  }
}
Areas are given in GeoJson format (FeatureCollection). Currently a member of this collection must be a Feature with a
geometry type Polygon. Note that the coordinates array of Polygon is an array of arrays that
each must describe a closed ring, i.e. the first point must be equal to the last, identical to the GeoJSON specs.
Each point is given as an array [longitude, latitude], so the coordinates array has three dimensions total.
Using the areas feature you can also block entire areas i.e. by multiplying the speed with 0, but for this you
should rather use the priority section that we will explain next.
Make sure you read the introductory section of this document to learn what the priority factor means. In short it
allows similar modifications as speed, but instead of modifying the road segment weights and travel times it will only
affect the weights. By default, the priority is 1 for every road segment, so it does not affect the weight. However,
changing the priority of a road can yield a relative weight difference in comparison to other roads.
Customizing the priority works very much like changing the speed, so in case you did not read the section about
speed you should go back there and read it now. The only real difference is that there is no limit_to operator for
priority. As a quick reminder here is an example for priority:
{
  "priority": [
    {
      "if": "road_class == MOTORWAY",
      "multiply_by": "0.5"
    },
    {
      "else_if": "road_class == SECONDARY",
      "multiply_by": "0.9"
    },
    {
      "if": "road_environment == TUNNEL",
      "multiply_by": "0.1"
    }
  ]
}
means that road segments with road_class==MOTORWAY and road_environment==TUNNEL get priority 0.5*0.1=0.05 and
those with road_class==SECONDARY and no TUNNEL, get priority 0.9 and so on.
Edges with lower priority values will be less likely part of the optimal route calculated by GraphHopper, higher values mean that these road segments shall be preferred. If you do not want to state which road segments shall be avoided, but rather which ones shall be preferred, you need to decrease the priority of others:
{
  "priority": [
    {
      "if": "road_class != CYCLEWAY",
      "multiply_by": "0.8"
    }
  ]
}
means decreasing the priority for all road_classes except cycleways.
Just like we saw for speed you can also adjust the priority for road segments in a certain area. It works exactly the
same way:
{
  "priority": [
    {
      "if": "in_custom1",
      "multiply_by": "0.7"
    }
  ]
}
To block an entire area set the priority value to 0. You can even set the priority only for certain roads in an area
like this:
{
  "priority": [
    {
      "if": "road_class == MOTORWAY && in_custom1",
      "multiply_by": "0.1"
    }
  ]
}
Some other useful attributes to restrict access to certain roads depending on your vehicle dimensions are the following:
{
  "priority": [
    {
      "if": "max_width < 2.5",
      "multiply_by": "0"
    },
    {
      "if": "max_length < 10",
      "multiply_by": "0"
    },
    {
      "if": "max_weight < 3.5",
      "multiply_by": "0"
    }
  ]
}
which means that the priority for all road segments that allow a maximum vehicle width of 2.5m, a maximum vehicle
length of 10m or a maximum vehicle weight of 3.5tons, or less, is zero, i.e. these "narrow" road segments are
blocked.
The distance_influence property allows you to control the trade-off between a fast route (minimum time) and a short route
(minimum distance). The larger distance_influence is the more GraphHopper will prioritize routes with a small
total distance. More precisely, the distance_influence is the time you need to save on a detour (a longer distance
route option) such that you prefer taking the detour compared to a shorter route. Please note that this value is a number, not a string.
A value of 100 means that one extra kilometer of detour must save you 100s of travelling time or else you are not
willing to take the detour. Or to put it another way, if a reference route takes 600s and is 10km long,
distance_influence=100 means that you are willing to take an alternative route that is 11km long only if
it takes no longer than 500s (saves 100s). Things get a bit more complicated when priority is not 1, but the
effect stays the same: The larger distance_influence is, the more GraphHopper will focus on finding short routes.
GraphHopper stores different attributes for every road segment. Some frequently used are the following (some of their possible values are given in brackets):
- road_class: (OTHER, MOTORWAY, TRUNK, PRIMARY, SECONDARY, TRACK, STEPS, CYCLEWAY, FOOTWAY, ...)
- road_environment: (ROAD, FERRY, BRIDGE, TUNNEL, ...)
- road_access: (DESTINATION, DELIVERY, PRIVATE, NO, ...)
- surface: (PAVED, DIRT, SAND, GRAVEL, ...)
- smoothness: (EXCELLENT, GOOD, INTERMEDIATE, ...)
- toll: (MISSING, NO, HGV, ALL)
- bike_network, foot_network: (MISSING, INTERNATIONAL, NATIONAL, REGIONAL, LOCAL, OTHER)
- country: (
MISSINGor the country as aISO3166-1:alpha3code e.g.DEU) - hazmat: (YES, NO), hazmat_tunnel: (A, B, .., E), hazmat_water: (YES, PERMISSIVE, NO)
- hgv: (MISSING, YES, DESIGNATED, ...)
- track_type: (MISSING, GRADE1, GRADE2, ..., GRADE5)
- urban_density: (RURAL, RESIDENTIAL, CITY)
To learn about all available encoded values you can query the /info endpoint
Besides this kind of categories, which can take multiple different string values, there are also some that represent a boolean value (they are either true or false for a given road segment), like:
- road_class_link
- roundabout
There are also some that take on a numeric value, like:
- average_slope: a number for 100 * "elevation change" / edge_distance for a road segment; it changes the sign in reverse direction; see also max_slope
- curvature: "beeline distance" / edge_distance (0..1) e.g. a curvy road is smaller than 1
- hike_rating, horse_rating, mtb_rating: a number from 0 to 6 for the
sac_scalein OSM, e.g. 0 means "missing", 1 means "hiking", 2 means "mountain_hiking" and so on - lanes: number of lanes
- max_slope: an unsigned decimal for the maximum slope (100 * "elevation change / distance_i") of an edge with
sum(distance_i)=edge_distance. Important for longer road segments where ups (or downs) can be much bigger than the average_slope. - max_speed: the speed limit from a sign (km/h)
- max_height (meter), max_width (meter), max_length (meter)
- max_weight (ton), max_axle_load (in tons)
You can directly use custom models with the POST Route Endpoint.
To use custom models with the Route Optimization API or the Matrix API, use the Profiles API to create a new named profile with your custom model. You can then use that profile like you would use a pre-defined profile.
This feature will strongly benefit from feedback, so do not hesitate to share your experience, your favorite custom model or some of the problems you ran into when you tried building your own custom model.
Recommendations
For debugging you can use the custom model editor in GraphHopper Maps (click the 'gear' button in the top left).
When debugging problems with custom models you should first try if your request goes through without an error using an empty custom model.
Route calculation is slower
The route calculation with custom_models will be slower as a different algorithm has to be used. The more the result deviates from the optimum the slower the response can get.
Still for certain use cases you can make the calculation faster when you tune the custom_model and e.g. exclude certain ways via { "if": "road_class == TRACK || road_class == RESIDENTIAL", "multiply_by": "0" }.
All routes for my custom model fail
This could mean that either your custom model made some of the roads near the start and destination inaccessible, then usually we return a PointNotFoundException with the point_index with the "location snap" problem.
Or, the custom model made a route between your start and destination impossible, then we return a ConnectionNotFoundException. This happens e.g. when you exclude tunnels, ferries or motorways but all routes between start and destination have these road attributes satisfied, i.e. we cannot find a route.
Solution for both cases: relax your custom model and e.g. instead of excluding certain road attributes via "multiply_by": "0" you should try to use "0.01".
The Route Optimization API can be used to solve traveling salesman or vehicle routing problems. Solve your first problem by following these steps. If you already have a GraphHopper account, start with step 2.
Download simple traveling salesman problem and save it in a local folder
Open your command line, go to that local folder and use cURL (What is cURL?) as follows:
curl -X POST -H "Content-Type: application/json" "https://graphhopper.com/api/1/vrp?key=YOUR_CREATED_API_KEY" --data "@tsp.json"
Alternatively, you can use our API Explorer to explore the Route Optimization API:
- Select 'Route Optimization API' in the left drop down
- Paste an existing JSON or select one from the examples
- Click 'Send' and analyze the solution on the map, in the table or as raw JSON output
If you have successfully solved the first problem, we recommend this tutorial - Getting Started with the Optimization API. It shows and describes the essential elements to model your vehicle routing problem.
To explore the full specification, we recommend that you either use our API explorer which will give you the output as JSON, in a table and directly on a map.
We provide a number of tutorials illustrating how to use the Route Optimization API and how to model your vehicle routing problems:
- Getting Start with the Optimization API - Traveling Salesman Problem
- How to solve a traveling salesman problem with a week-planning horizon?
- How to schedule technicians with skills and multiple dependencies between tasks?
- What is the difference between the min. of completion time and min. transport time?
- How to model multiple delivery routes with a single vehicle?
POST route optimization problem
To get started with the Route Optimization API, please read the introduction.
To solve a new vehicle routing problem, make a HTTP POST to this URL
https://graphhopper.com/api/1/vrp?key=<your_key>
It returns the solution to this problem in the JSON response.
Please note that this URL is very well suited to solve minor problems. Larger vehicle routing problems, which take longer than 10 seconds to solve, cannot be solved. To solve them, please use the batch mode URL instead.
Request Body schema: application/jsonrequired
The request that contains the vehicle routing problem to be solved.
Array of objects (Vehicle) non-empty Specifies the available vehicles. | |
Array of objects (VehicleType) Specifies the available vehicle types. These types can be assigned to vehicles. | |
Array of objects (Service) Specifies the orders of the type "service". These are, for example, pick-ups, deliveries or other stops that are to be approached by the specified vehicles. Each of these orders contains only one location. | |
Array of objects (Shipment) Specifies the available shipments. Each shipment contains a pickup and a delivery stop, which must be processed one after the other. | |
Array of JobRelation (object) or GroupRelation (object) Defines additional relationships between orders. | |
object (Algorithm) Deprecated Use | |
Array of objects (Objective) Specifies an objective function. The vehicle routing problem is solved in such a way that this objective function is minimized. | |
Array of objects (CostMatrix) Specifies your own tranport time and distance matrices. | |
object (Configuration) Specifies general configurations. |
A response containing the solution
Error occurred when reading the request. Request is invalid.
Error occurred on server side.
- Payload
- Curl
- Java
- JavaScript
- Python
- PHP
- Ruby
- C#
- Go
- Node.js
{- "vehicles": [
- {
- "vehicle_id": "vehicle-1",
- "type_id": "cargo-bike",
- "start_address": {
- "location_id": "berlin",
- "lon": 13.406,
- "lat": 52.537
}, - "earliest_start": 1554804329,
- "latest_end": 1554808329,
- "max_jobs": 3
}, - {
- "vehicle_id": "vehicle-2",
- "type_id": "cargo-bike",
- "start_address": {
- "location_id": "berlin",
- "lon": 13.406,
- "lat": 52.537
}, - "earliest_start": 1554804329,
- "latest_end": 1554808329,
- "max_jobs": 3,
- "skills": [
- "physical strength"
]
}
], - "vehicle_types": [
- {
- "type_id": "cargo-bike",
- "capacity": [
- 10
], - "profile": "bike"
}
], - "services": [
- {
- "id": "s-1",
- "name": "visit-Joe",
- "address": {
- "location_id": "13.375854_52.537338",
- "lon": 13.375854,
- "lat": 52.537338
}, - "size": [
- 1
], - "time_windows": [
- {
- "earliest": 1554805329,
- "latest": 1554806329
}
]
}, - {
- "id": "s-2",
- "name": "serve-Peter",
- "address": {
- "location_id": "13.393364_52.525851",
- "lon": 13.393364,
- "lat": 52.525851
}, - "size": [
- 1
]
}, - {
- "id": "s-3",
- "name": "visit-Michael",
- "address": {
- "location_id": "13.416882_52.523543",
- "lon": 13.416882,
- "lat": 52.523543
}, - "size": [
- 1
]
}, - {
- "id": "s-4",
- "name": "do nothing",
- "address": {
- "location_id": "13.395767_52.514038",
- "lon": 13.395767,
- "lat": 52.514038
}, - "size": [
- 1
]
}
], - "shipments": [
- {
- "id": "7fe77504-7df8-4497-843c-02d70b6490ce",
- "name": "pickup and deliver pizza to Peter",
- "priority": 1,
- "pickup": {
- "address": {
- "location_id": "13.387613_52.529961",
- "lon": 13.387613,
- "lat": 52.529961
}
}, - "delivery": {
- "address": {
- "location_id": "13.380575_52.513614",
- "lon": 13.380575,
- "lat": 52.513614
}
}, - "size": [
- 1
], - "required_skills": [
- "physical strength"
]
}
], - "objectives": [
- {
- "type": "min",
- "value": "vehicles"
}, - {
- "type": "min",
- "value": "completion_time"
}
], - "configuration": {
- "routing": {
- "calc_points": true,
- "snap_preventions": [
- "motorway",
- "trunk",
- "tunnel",
- "bridge",
- "ferry"
]
}
}
}- 200
- 400
- 500
{- "copyrights": [
- "GraphHopper",
- "OpenStreetMap contributors"
], - "job_id": "d62fcadd-c84a-4298-90b5-28550125bec5",
- "status": "finished",
- "waiting_time_in_queue": 0,
- "processing_time": 459,
- "solution": {
- "costs": 438,
- "distance": 17994,
- "time": 4094,
- "transport_time": 4094,
- "completion_time": 4172,
- "max_operation_time": 2465,
- "waiting_time": 78,
- "service_duration": 0,
- "preparation_time": 0,
- "no_vehicles": 2,
- "no_unassigned": 0,
- "routes": [
- {
- "vehicle_id": "vehicle-2",
- "distance": 10618,
- "transport_time": 2465,
- "completion_time": 2465,
- "waiting_time": 0,
- "service_duration": 0,
- "preparation_time": 0,
- "points": [
- {
- "coordinates": [
- [
- 13.40608,
- 52.53701
], - [
- 13.40643,
- 52.53631
], - [
- 13.40554,
- 52.53616
], - [
- 13.4054,
- 52.53608
], - [
- 13.40445,
- 52.53513
], - [
- 13.40436,
- 52.53509
], - [
- 13.40428,
- 52.53508
], - [
- 13.40463,
- 52.53419
], - [
- 13.40451,
- 52.53419
], - [
- 13.4034,
- 52.53401
], - [
- 13.403,
- 52.53359
], - [
- 13.40291,
- 52.53354
], - [
- 13.40268,
- 52.53347
], - [
- 13.39888,
- 52.53259
], - [
- 13.39839,
- 52.53253
], - [
- 13.39812,
- 52.53251
], - [
- 13.39616,
- 52.53243
], - [
- 13.39579,
- 52.5324
], - [
- 13.38973,
- 52.53173
], - [
- 13.39163,
- 52.53025
], - [
- 13.38797,
- 52.52935
], - [
- 13.38763,
- 52.52996
]
], - "type": "LineString"
}, - {
- "coordinates": [
- [
- 13.38763,
- 52.52996
], - [
- 13.38739,
- 52.53039
], - [
- 13.38724,
- 52.53036
], - [
- 13.38464,
- 52.52929
], - [
- 13.38538,
- 52.52871
], - [
- 13.38634,
- 52.52792
], - [
- 13.38638,
- 52.52779
], - [
- 13.38657,
- 52.52763
], - [
- 13.38676,
- 52.52741
], - [
- 13.38698,
- 52.52713
], - [
- 13.38704,
- 52.52701
], - [
- 13.38753,
- 52.524
], - [
- 13.3877,
- 52.52307
], - [
- 13.3878,
- 52.52282
], - [
- 13.38788,
- 52.52252
], - [
- 13.38802,
- 52.52174
], - [
- 13.38519,
- 52.52009
], - [
- 13.38539,
- 52.5191
], - [
- 13.38548,
- 52.51852
], - [
- 13.38042,
- 52.51819
], - [
- 13.38071,
- 52.5167
], - [
- 13.38076,
- 52.51652
], - [
- 13.38084,
- 52.51634
], - [
- 13.3821,
- 52.51396
], - [
- 13.38055,
- 52.51365
]
], - "type": "LineString"
}, - {
- "coordinates": [
- [
- 13.38055,
- 52.51365
], - [
- 13.38229,
- 52.514
], - [
- 13.38363,
- 52.51429
], - [
- 13.3848,
- 52.51445
], - [
- 13.38504,
- 52.51358
], - [
- 13.39124,
- 52.51397
], - [
- 13.3911,
- 52.51488
], - [
- 13.39303,
- 52.51499
], - [
- 13.39317,
- 52.5141
], - [
- 13.39548,
- 52.51419
], - [
- 13.39571,
- 52.51421
]
], - "type": "LineString"
}, - {
- "coordinates": [
- [
- 13.39571,
- 52.51421
], - [
- 13.39695,
- 52.51434
], - [
- 13.39674,
- 52.51523
], - [
- 13.39742,
- 52.51531
], - [
- 13.39873,
- 52.51558
], - [
- 13.39846,
- 52.51599
], - [
- 13.39825,
- 52.51729
], - [
- 13.39805,
- 52.51755
], - [
- 13.39892,
- 52.51761
], - [
- 13.39917,
- 52.51764
], - [
- 13.39964,
- 52.51775
], - [
- 13.40009,
- 52.51791
], - [
- 13.40034,
- 52.51797
], - [
- 13.4021,
- 52.51864
], - [
- 13.40288,
- 52.51896
], - [
- 13.40375,
- 52.51936
], - [
- 13.40498,
- 52.52001
], - [
- 13.40463,
- 52.5203
], - [
- 13.40311,
- 52.52144
], - [
- 13.40442,
- 52.52189
], - [
- 13.40448,
- 52.52192
], - [
- 13.40451,
- 52.52195
], - [
- 13.40473,
- 52.52199
], - [
- 13.40504,
- 52.52208
], - [
- 13.40572,
- 52.52235
], - [
- 13.40687,
- 52.52294
], - [
- 13.40693,
- 52.52299
], - [
- 13.40706,
- 52.52319
], - [
- 13.40738,
- 52.52378
], - [
- 13.40787,
- 52.52443
], - [
- 13.4079,
- 52.52453
], - [
- 13.40938,
- 52.52401
], - [
- 13.40962,
- 52.52398
], - [
- 13.41001,
- 52.52395
], - [
- 13.41072,
- 52.52391
], - [
- 13.41215,
- 52.52389
], - [
- 13.41233,
- 52.52386
], - [
- 13.4131,
- 52.5235
], - [
- 13.41288,
- 52.52333
], - [
- 13.41475,
- 52.52247
], - [
- 13.41496,
- 52.52264
], - [
- 13.41523,
- 52.52251
], - [
- 13.41633,
- 52.52338
], - [
- 13.41631,
- 52.52346
], - [
- 13.41654,
- 52.52364
], - [
- 13.41684,
- 52.52351
]
], - "type": "LineString"
}, - {
- "coordinates": [
- [
- 13.41684,
- 52.52351
], - [
- 13.41654,
- 52.52364
], - [
- 13.41631,
- 52.52346
], - [
- 13.4163,
- 52.52344
], - [
- 13.41587,
- 52.52363
], - [
- 13.41572,
- 52.5235
], - [
- 13.41409,
- 52.5242
], - [
- 13.41454,
- 52.52461
], - [
- 13.41454,
- 52.52466
], - [
- 13.41358,
- 52.52508
], - [
- 13.41366,
- 52.52514
], - [
- 13.41344,
- 52.52525
], - [
- 13.4133,
- 52.52514
], - [
- 13.41316,
- 52.5252
], - [
- 13.41107,
- 52.52585
], - [
- 13.41118,
- 52.52606
], - [
- 13.41118,
- 52.52616
], - [
- 13.41095,
- 52.52664
], - [
- 13.41097,
- 52.52678
], - [
- 13.41084,
- 52.52706
], - [
- 13.41057,
- 52.52747
], - [
- 13.41028,
- 52.52809
], - [
- 13.41032,
- 52.52821
], - [
- 13.4102,
- 52.52847
], - [
- 13.40999,
- 52.52875
], - [
- 13.40984,
- 52.52905
], - [
- 13.40982,
- 52.52914
], - [
- 13.40984,
- 52.52926
], - [
- 13.4104,
- 52.52998
], - [
- 13.4105,
- 52.53001
], - [
- 13.41064,
- 52.53016
], - [
- 13.41082,
- 52.5303
], - [
- 13.41198,
- 52.53107
], - [
- 13.4122,
- 52.53128
], - [
- 13.41232,
- 52.53143
], - [
- 13.41247,
- 52.53192
], - [
- 13.41267,
- 52.53245
], - [
- 13.41275,
- 52.53259
], - [
- 13.41215,
- 52.5327
], - [
- 13.40731,
- 52.53463
], - [
- 13.40608,
- 52.53701
]
], - "type": "LineString"
}
], - "activities": [
- {
- "type": "start",
- "location_id": "berlin",
- "address": {
- "location_id": "berlin",
- "lat": 52.537,
- "lon": 13.406
}, - "end_time": 1554804329,
- "end_date_time": null,
- "distance": 0,
- "driving_time": 0,
- "preparation_time": 0,
- "waiting_time": 0,
- "load_after": [
- 0
]
}, - {
- "type": "pickupShipment",
- "id": "7fe77504-7df8-4497-843c-02d70b6490ce",
- "location_id": "13.387613_52.529961",
- "address": {
- "location_id": "13.387613_52.529961",
- "lat": 52.529961,
- "lon": 13.387613
}, - "arr_time": 1554804789,
- "arr_date_time": null,
- "end_time": 1554804789,
- "end_date_time": null,
- "waiting_time": 0,
- "distance": 2012,
- "driving_time": 460,
- "preparation_time": 0,
- "load_before": [
- 0
], - "load_after": [
- 1
]
}, - {
- "type": "deliverShipment",
- "id": "7fe77504-7df8-4497-843c-02d70b6490ce",
- "location_id": "13.380575_52.513614",
- "address": {
- "location_id": "13.380575_52.513614",
- "lat": 52.513614,
- "lon": 13.380575
}, - "arr_time": 1554805344,
- "arr_date_time": null,
- "end_time": 1554805344,
- "end_date_time": null,
- "waiting_time": 0,
- "distance": 4560,
- "driving_time": 1015,
- "preparation_time": 0,
- "load_before": [
- 1
], - "load_after": [
- 0
]
}, - {
- "type": "service",
- "id": "s-4",
- "location_id": "13.395767_52.514038",
- "address": {
- "location_id": "13.395767_52.514038",
- "lat": 52.514038,
- "lon": 13.395767
}, - "arr_time": 1554805632,
- "arr_date_time": null,
- "end_time": 1554805632,
- "end_date_time": null,
- "waiting_time": 0,
- "distance": 5887,
- "driving_time": 1303,
- "preparation_time": 0,
- "load_before": [
- 0
], - "load_after": [
- 1
]
}, - {
- "type": "service",
- "id": "s-3",
- "location_id": "13.416882_52.523543",
- "address": {
- "location_id": "13.416882_52.523543",
- "lat": 52.523543,
- "lon": 13.416882
}, - "arr_time": 1554806253,
- "arr_date_time": null,
- "end_time": 1554806253,
- "end_date_time": null,
- "waiting_time": 0,
- "distance": 8486,
- "driving_time": 1924,
- "preparation_time": 0,
- "load_before": [
- 1
], - "load_after": [
- 2
]
}, - {
- "type": "end",
- "location_id": "berlin",
- "address": {
- "location_id": "berlin",
- "lat": 52.537,
- "lon": 13.406
}, - "arr_time": 1554806794,
- "arr_date_time": null,
- "distance": 10618,
- "driving_time": 2465,
- "preparation_time": 0,
- "waiting_time": 0,
- "load_before": [
- 2
]
}
]
}, - {
- "vehicle_id": "vehicle-1",
- "distance": 7376,
- "transport_time": 1629,
- "completion_time": 1707,
- "waiting_time": 78,
- "service_duration": 0,
- "preparation_time": 0,
- "points": [
- {
- "coordinates": [
- [
- 13.40608,
- 52.53701
], - [
- 13.40674,
- 52.53571
], - [
- 13.40433,
- 52.53313
], - [
- 13.40271,
- 52.53149
], - [
- 13.40246,
- 52.53121
], - [
- 13.40148,
- 52.52999
], - [
- 13.40128,
- 52.52993
], - [
- 13.40118,
- 52.52988
], - [
- 13.40133,
- 52.5296
], - [
- 13.40138,
- 52.52951
], - [
- 13.40167,
- 52.52914
], - [
- 13.40188,
- 52.52895
], - [
- 13.398,
- 52.52885
], - [
- 13.39289,
- 52.52748
], - [
- 13.39354,
- 52.5264
], - [
- 13.39358,
- 52.52628
], - [
- 13.39324,
- 52.52575
], - [
- 13.39334,
- 52.52573
], - [
- 13.39339,
- 52.52584
]
], - "type": "LineString"
}, - {
- "coordinates": [
- [
- 13.39339,
- 52.52584
], - [
- 13.3934,
- 52.52599
], - [
- 13.39358,
- 52.52628
], - [
- 13.39354,
- 52.5264
], - [
- 13.39242,
- 52.52823
], - [
- 13.39381,
- 52.52852
], - [
- 13.38973,
- 52.53173
], - [
- 13.38717,
- 52.5315
], - [
- 13.38678,
- 52.5315
], - [
- 13.38641,
- 52.53147
], - [
- 13.38617,
- 52.53143
], - [
- 13.38607,
- 52.53155
], - [
- 13.38526,
- 52.53225
], - [
- 13.38501,
- 52.53252
], - [
- 13.38316,
- 52.53418
], - [
- 13.38179,
- 52.5355
], - [
- 13.38084,
- 52.53523
], - [
- 13.38081,
- 52.53531
], - [
- 13.3795,
- 52.53677
], - [
- 13.37941,
- 52.53682
], - [
- 13.37935,
- 52.53683
], - [
- 13.37919,
- 52.53682
], - [
- 13.37617,
- 52.5361
], - [
- 13.37502,
- 52.53698
], - [
- 13.37584,
- 52.53734
]
], - "type": "LineString"
}, - {
- "coordinates": [
- [
- 13.37584,
- 52.53734
], - [
- 13.37566,
- 52.53726
], - [
- 13.37515,
- 52.53763
], - [
- 13.37644,
- 52.53841
], - [
- 13.37807,
- 52.53935
], - [
- 13.37946,
- 52.5402
], - [
- 13.3796,
- 52.54019
], - [
- 13.37984,
- 52.54021
], - [
- 13.37988,
- 52.54012
], - [
- 13.38062,
- 52.53936
], - [
- 13.38169,
- 52.53832
], - [
- 13.38236,
- 52.5377
], - [
- 13.38363,
- 52.53661
], - [
- 13.38492,
- 52.53555
], - [
- 13.38613,
- 52.53447
], - [
- 13.38757,
- 52.53338
], - [
- 13.38791,
- 52.53354
], - [
- 13.38812,
- 52.53368
], - [
- 13.38833,
- 52.53392
], - [
- 13.38977,
- 52.53518
], - [
- 13.39003,
- 52.53539
], - [
- 13.39256,
- 52.53701
], - [
- 13.39316,
- 52.53739
], - [
- 13.39327,
- 52.53744
], - [
- 13.3936,
- 52.53757
], - [
- 13.40155,
- 52.53982
], - [
- 13.40357,
- 52.53715
], - [
- 13.40372,
- 52.53719
], - [
- 13.40465,
- 52.53727
], - [
- 13.4048,
- 52.53726
], - [
- 13.4059,
- 52.53736
], - [
- 13.40608,
- 52.53701
]
], - "type": "LineString"
}
], - "activities": [
- {
- "type": "start",
- "location_id": "berlin",
- "address": {
- "location_id": "berlin",
- "lat": 52.537,
- "lon": 13.406
}, - "end_time": 1554804329,
- "end_date_time": null,
- "distance": 0,
- "driving_time": 0,
- "preparation_time": 0,
- "waiting_time": 0,
- "load_after": [
- 0
]
}, - {
- "type": "service",
- "id": "s-2",
- "location_id": "13.393364_52.525851",
- "address": {
- "location_id": "13.393364_52.525851",
- "lat": 52.525851,
- "lon": 13.393364
}, - "arr_time": 1554804743,
- "arr_date_time": null,
- "end_time": 1554804743,
- "end_date_time": null,
- "waiting_time": 0,
- "distance": 1884,
- "driving_time": 414,
- "preparation_time": 0,
- "load_before": [
- 0
], - "load_after": [
- 1
]
}, - {
- "type": "service",
- "id": "s-1",
- "location_id": "13.375854_52.537338",
- "address": {
- "location_id": "13.375854_52.537338",
- "lat": 52.537338,
- "lon": 13.375854
}, - "arr_time": 1554805251,
- "arr_date_time": null,
- "end_time": 1554805329,
- "end_date_time": null,
- "waiting_time": 78,
- "distance": 4205,
- "driving_time": 922,
- "preparation_time": 0,
- "load_before": [
- 1
], - "load_after": [
- 2
]
}, - {
- "type": "end",
- "location_id": "berlin",
- "address": {
- "location_id": "berlin",
- "lat": 52.537,
- "lon": 13.406
}, - "arr_time": 1554806036,
- "arr_date_time": null,
- "distance": 7376,
- "driving_time": 1629,
- "preparation_time": 0,
- "waiting_time": 0,
- "load_before": [
- 2
]
}
]
}
], - "unassigned": {
- "services": [ ],
- "shipments": [ ],
- "breaks": [ ],
- "details": [ ]
}
}
}POST route optimization problem (batch mode)
To solve a vehicle routing problem, perform the following steps:
1.) Make a HTTP POST to this URL
https://graphhopper.com/api/1/vrp/optimize?key=<your_key>
It returns a job id (job_id).
2.) Take the job id and fetch the solution for the vehicle routing problem from this URL:
https://graphhopper.com/api/1/vrp/solution/<job_id>?key=<your_key>
We recommend to query the solution every 500ms until it returns 'status=finished'.
Note: Since the workflow is a bit more cumbersome and since you lose some time in fetching the solution, you should always prefer the synchronous endpoint. You should use the batch mode only for long running problems.
Request Body schema: application/jsonrequired
The request that contains the problem to be solved.
Array of objects (Vehicle) non-empty Specifies the available vehicles. | |
Array of objects (VehicleType) Specifies the available vehicle types. These types can be assigned to vehicles. | |
Array of objects (Service) Specifies the orders of the type "service". These are, for example, pick-ups, deliveries or other stops that are to be approached by the specified vehicles. Each of these orders contains only one location. | |
Array of objects (Shipment) Specifies the available shipments. Each shipment contains a pickup and a delivery stop, which must be processed one after the other. | |
Array of JobRelation (object) or GroupRelation (object) Defines additional relationships between orders. | |
object (Algorithm) Deprecated Use | |
Array of objects (Objective) Specifies an objective function. The vehicle routing problem is solved in such a way that this objective function is minimized. | |
Array of objects (CostMatrix) Specifies your own tranport time and distance matrices. | |
object (Configuration) Specifies general configurations. |
A jobId you can use to retrieve your solution from the server - see solution endpoint.
Error occurred when reading client request. Request is invalid.
Error occurred on server side.
- Payload
- Curl
- Java
- JavaScript
- Python
- PHP
- Ruby
- C#
- Go
- Node.js
{- "vehicles": [
- {
- "vehicle_id": "vehicle-1",
- "type_id": "cargo-bike",
- "start_address": {
- "location_id": "berlin",
- "lon": 13.406,
- "lat": 52.537
}, - "earliest_start": 1554804329,
- "latest_end": 1554808329,
- "max_jobs": 3
}, - {
- "vehicle_id": "vehicle-2",
- "type_id": "cargo-bike",
- "start_address": {
- "location_id": "berlin",
- "lon": 13.406,
- "lat": 52.537
}, - "earliest_start": 1554804329,
- "latest_end": 1554808329,
- "max_jobs": 3,
- "skills": [
- "physical strength"
]
}
], - "vehicle_types": [
- {
- "type_id": "cargo-bike",
- "capacity": [
- 10
], - "profile": "bike"
}
], - "services": [
- {
- "id": "s-1",
- "name": "visit-Joe",
- "address": {
- "location_id": "13.375854_52.537338",
- "lon": 13.375854,
- "lat": 52.537338
}, - "size": [
- 1
], - "time_windows": [
- {
- "earliest": 1554805329,
- "latest": 1554806329
}
]
}, - {
- "id": "s-2",
- "name": "serve-Peter",
- "address": {
- "location_id": "13.393364_52.525851",
- "lon": 13.393364,
- "lat": 52.525851
}, - "size": [
- 1
]
}, - {
- "id": "s-3",
- "name": "visit-Michael",
- "address": {
- "location_id": "13.416882_52.523543",
- "lon": 13.416882,
- "lat": 52.523543
}, - "size": [
- 1
]
}, - {
- "id": "s-4",
- "name": "do nothing",
- "address": {
- "location_id": "13.395767_52.514038",
- "lon": 13.395767,
- "lat": 52.514038
}, - "size": [
- 1
]
}
], - "shipments": [
- {
- "id": "7fe77504-7df8-4497-843c-02d70b6490ce",
- "name": "pickup and deliver pizza to Peter",
- "priority": 1,
- "pickup": {
- "address": {
- "location_id": "13.387613_52.529961",
- "lon": 13.387613,
- "lat": 52.529961
}
}, - "delivery": {
- "address": {
- "location_id": "13.380575_52.513614",
- "lon": 13.380575,
- "lat": 52.513614
}
}, - "size": [
- 1
], - "required_skills": [
- "physical strength"
]
}
], - "objectives": [
- {
- "type": "min",
- "value": "vehicles"
}, - {
- "type": "min",
- "value": "completion_time"
}
], - "configuration": {
- "routing": {
- "calc_points": true,
- "snap_preventions": [
- "motorway",
- "trunk",
- "tunnel",
- "bridge",
- "ferry"
]
}
}
}- 200
- 400
- 500
{- "job_id": "44886560-b584-4da5-b245-768151dacd8f"
}GET the solution (batch mode)
Take the job id and fetch the solution for the vehicle routing problem from this URL:
https://graphhopper.com/api/1/vrp/solution/<job_id>?key=<your_key>
You get the job id by sending a vehicle routing problem to the batch mode URL.
A response containing the solution
Error occurred on client side such as invalid input.
Requested solution could not be found.
Error occurred on server side.
- Curl
- Java
- JavaScript
- Python
- PHP
- Ruby
- C#
- Go
- Node.js
curl -X GET "https://graphhopper.com/api/1/vrp/solution/job_id?key=api_key"
- 200
- 400
- 404
{- "copyrights": [
- "GraphHopper",
- "OpenStreetMap contributors"
], - "job_id": "d62fcadd-c84a-4298-90b5-28550125bec5",
- "status": "finished",
- "waiting_time_in_queue": 0,
- "processing_time": 459,
- "solution": {
- "costs": 438,
- "distance": 17994,
- "time": 4094,
- "transport_time": 4094,
- "completion_time": 4172,
- "max_operation_time": 2465,
- "waiting_time": 78,
- "service_duration": 0,
- "preparation_time": 0,
- "no_vehicles": 2,
- "no_unassigned": 0,
- "routes": [
- {
- "vehicle_id": "vehicle-2",
- "distance": 10618,
- "transport_time": 2465,
- "completion_time": 2465,
- "waiting_time": 0,
- "service_duration": 0,
- "preparation_time": 0,
- "points": [
- {
- "coordinates": [
- [
- 13.40608,
- 52.53701
], - [
- 13.40643,
- 52.53631
], - [
- 13.40554,
- 52.53616
], - [
- 13.4054,
- 52.53608
], - [
- 13.40445,
- 52.53513
], - [
- 13.40436,
- 52.53509
], - [
- 13.40428,
- 52.53508
], - [
- 13.40463,
- 52.53419
], - [
- 13.40451,
- 52.53419
], - [
- 13.4034,
- 52.53401
], - [
- 13.403,
- 52.53359
], - [
- 13.40291,
- 52.53354
], - [
- 13.40268,
- 52.53347
], - [
- 13.39888,
- 52.53259
], - [
- 13.39839,
- 52.53253
], - [
- 13.39812,
- 52.53251
], - [
- 13.39616,
- 52.53243
], - [
- 13.39579,
- 52.5324
], - [
- 13.38973,
- 52.53173
], - [
- 13.39163,
- 52.53025
], - [
- 13.38797,
- 52.52935
], - [
- 13.38763,
- 52.52996
]
], - "type": "LineString"
}, - {
- "coordinates": [
- [
- 13.38763,
- 52.52996
], - [
- 13.38739,
- 52.53039
], - [
- 13.38724,
- 52.53036
], - [
- 13.38464,
- 52.52929
], - [
- 13.38538,
- 52.52871
], - [
- 13.38634,
- 52.52792
], - [
- 13.38638,
- 52.52779
], - [
- 13.38657,
- 52.52763
], - [
- 13.38676,
- 52.52741
], - [
- 13.38698,
- 52.52713
], - [
- 13.38704,
- 52.52701
], - [
- 13.38753,
- 52.524
], - [
- 13.3877,
- 52.52307
], - [
- 13.3878,
- 52.52282
], - [
- 13.38788,
- 52.52252
], - [
- 13.38802,
- 52.52174
], - [
- 13.38519,
- 52.52009
], - [
- 13.38539,
- 52.5191
], - [
- 13.38548,
- 52.51852
], - [
- 13.38042,
- 52.51819
], - [
- 13.38071,
- 52.5167
], - [
- 13.38076,
- 52.51652
], - [
- 13.38084,
- 52.51634
], - [
- 13.3821,
- 52.51396
], - [
- 13.38055,
- 52.51365
]
], - "type": "LineString"
}, - {
- "coordinates": [
- [
- 13.38055,
- 52.51365
], - [
- 13.38229,
- 52.514
], - [
- 13.38363,
- 52.51429
], - [
- 13.3848,
- 52.51445
], - [
- 13.38504,
- 52.51358
], - [
- 13.39124,
- 52.51397
], - [
- 13.3911,
- 52.51488
], - [
- 13.39303,
- 52.51499
], - [
- 13.39317,
- 52.5141
], - [
- 13.39548,
- 52.51419
], - [
- 13.39571,
- 52.51421
]
], - "type": "LineString"
}, - {
- "coordinates": [
- [
- 13.39571,
- 52.51421
], - [
- 13.39695,
- 52.51434
], - [
- 13.39674,
- 52.51523
], - [
- 13.39742,
- 52.51531
], - [
- 13.39873,
- 52.51558
], - [
- 13.39846,
- 52.51599
], - [
- 13.39825,
- 52.51729
], - [
- 13.39805,
- 52.51755
], - [
- 13.39892,
- 52.51761
], - [
- 13.39917,
- 52.51764
], - [
- 13.39964,
- 52.51775
], - [
- 13.40009,
- 52.51791
], - [
- 13.40034,
- 52.51797
], - [
- 13.4021,
- 52.51864
], - [
- 13.40288,
- 52.51896
], - [
- 13.40375,
- 52.51936
], - [
- 13.40498,
- 52.52001
], - [
- 13.40463,
- 52.5203
], - [
- 13.40311,
- 52.52144
], - [
- 13.40442,
- 52.52189
], - [
- 13.40448,
- 52.52192
], - [
- 13.40451,
- 52.52195
], - [
- 13.40473,
- 52.52199
], - [
- 13.40504,
- 52.52208
], - [
- 13.40572,
- 52.52235
], - [
- 13.40687,
- 52.52294
], - [
- 13.40693,
- 52.52299
], - [
- 13.40706,
- 52.52319
], - [
- 13.40738,
- 52.52378
], - [
- 13.40787,
- 52.52443
], - [
- 13.4079,
- 52.52453
], - [
- 13.40938,
- 52.52401
], - [
- 13.40962,
- 52.52398
], - [
- 13.41001,
- 52.52395
], - [
- 13.41072,
- 52.52391
], - [
- 13.41215,
- 52.52389
], - [
- 13.41233,
- 52.52386
], - [
- 13.4131,
- 52.5235
], - [
- 13.41288,
- 52.52333
], - [
- 13.41475,
- 52.52247
], - [
- 13.41496,
- 52.52264
], - [
- 13.41523,
- 52.52251
], - [
- 13.41633,
- 52.52338
], - [
- 13.41631,
- 52.52346
], - [
- 13.41654,
- 52.52364
], - [
- 13.41684,
- 52.52351
]
], - "type": "LineString"
}, - {
- "coordinates": [
- [
- 13.41684,
- 52.52351
], - [
- 13.41654,
- 52.52364
], - [
- 13.41631,
- 52.52346
], - [
- 13.4163,
- 52.52344
], - [
- 13.41587,
- 52.52363
], - [
- 13.41572,
- 52.5235
], - [
- 13.41409,
- 52.5242
], - [
- 13.41454,
- 52.52461
], - [
- 13.41454,
- 52.52466
], - [
- 13.41358,
- 52.52508
], - [
- 13.41366,
- 52.52514
], - [
- 13.41344,
- 52.52525
], - [
- 13.4133,
- 52.52514
], - [
- 13.41316,
- 52.5252
], - [
- 13.41107,
- 52.52585
], - [
- 13.41118,
- 52.52606
], - [
- 13.41118,
- 52.52616
], - [
- 13.41095,
- 52.52664
], - [
- 13.41097,
- 52.52678
], - [
- 13.41084,
- 52.52706
], - [
- 13.41057,
- 52.52747
], - [
- 13.41028,
- 52.52809
], - [
- 13.41032,
- 52.52821
], - [
- 13.4102,
- 52.52847
], - [
- 13.40999,
- 52.52875
], - [
- 13.40984,
- 52.52905
], - [
- 13.40982,
- 52.52914
], - [
- 13.40984,
- 52.52926
], - [
- 13.4104,
- 52.52998
], - [
- 13.4105,
- 52.53001
], - [
- 13.41064,
- 52.53016
], - [
- 13.41082,
- 52.5303
], - [
- 13.41198,
- 52.53107
], - [
- 13.4122,
- 52.53128
], - [
- 13.41232,
- 52.53143
], - [
- 13.41247,
- 52.53192
], - [
- 13.41267,
- 52.53245
], - [
- 13.41275,
- 52.53259
], - [
- 13.41215,
- 52.5327
], - [
- 13.40731,
- 52.53463
], - [
- 13.40608,
- 52.53701
]
], - "type": "LineString"
}
], - "activities": [
- {
- "type": "start",
- "location_id": "berlin",
- "address": {
- "location_id": "berlin",
- "lat": 52.537,
- "lon": 13.406
}, - "end_time": 1554804329,
- "end_date_time": null,
- "distance": 0,
- "driving_time": 0,
- "preparation_time": 0,
- "waiting_time": 0,
- "load_after": [
- 0
]
}, - {
- "type": "pickupShipment",
- "id": "7fe77504-7df8-4497-843c-02d70b6490ce",
- "location_id": "13.387613_52.529961",
- "address": {
- "location_id": "13.387613_52.529961",
- "lat": 52.529961,
- "lon": 13.387613
}, - "arr_time": 1554804789,
- "arr_date_time": null,
- "end_time": 1554804789,
- "end_date_time": null,
- "waiting_time": 0,
- "distance": 2012,
- "driving_time": 460,
- "preparation_time": 0,
- "load_before": [
- 0
], - "load_after": [
- 1
]
}, - {
- "type": "deliverShipment",
- "id": "7fe77504-7df8-4497-843c-02d70b6490ce",
- "location_id": "13.380575_52.513614",
- "address": {
- "location_id": "13.380575_52.513614",
- "lat": 52.513614,
- "lon": 13.380575
}, - "arr_time": 1554805344,
- "arr_date_time": null,
- "end_time": 1554805344,
- "end_date_time": null,
- "waiting_time": 0,
- "distance": 4560,
- "driving_time": 1015,
- "preparation_time": 0,
- "load_before": [
- 1
], - "load_after": [
- 0
]
}, - {
- "type": "service",
- "id": "s-4",
- "location_id": "13.395767_52.514038",
- "address": {
- "location_id": "13.395767_52.514038",
- "lat": 52.514038,
- "lon": 13.395767
}, - "arr_time": 1554805632,
- "arr_date_time": null,
- "end_time": 1554805632,
- "end_date_time": null,
- "waiting_time": 0,
- "distance": 5887,
- "driving_time": 1303,
- "preparation_time": 0,
- "load_before": [
- 0
], - "load_after": [
- 1
]
}, - {
- "type": "service",
- "id": "s-3",
- "location_id": "13.416882_52.523543",
- "address": {
- "location_id": "13.416882_52.523543",
- "lat": 52.523543,
- "lon": 13.416882
}, - "arr_time": 1554806253,
- "arr_date_time": null,
- "end_time": 1554806253,
- "end_date_time": null,
- "waiting_time": 0,
- "distance": 8486,
- "driving_time": 1924,
- "preparation_time": 0,
- "load_before": [
- 1
], - "load_after": [
- 2
]
}, - {
- "type": "end",
- "location_id": "berlin",
- "address": {
- "location_id": "berlin",
- "lat": 52.537,
- "lon": 13.406
}, - "arr_time": 1554806794,
- "arr_date_time": null,
- "distance": 10618,
- "driving_time": 2465,
- "preparation_time": 0,
- "waiting_time": 0,
- "load_before": [
- 2
]
}
]
}, - {
- "vehicle_id": "vehicle-1",
- "distance": 7376,
- "transport_time": 1629,
- "completion_time": 1707,
- "waiting_time": 78,
- "service_duration": 0,
- "preparation_time": 0,
- "points": [
- {
- "coordinates": [
- [
- 13.40608,
- 52.53701
], - [
- 13.40674,
- 52.53571
], - [
- 13.40433,
- 52.53313
], - [
- 13.40271,
- 52.53149
], - [
- 13.40246,
- 52.53121
], - [
- 13.40148,
- 52.52999
], - [
- 13.40128,
- 52.52993
], - [
- 13.40118,
- 52.52988
], - [
- 13.40133,
- 52.5296
], - [
- 13.40138,
- 52.52951
], - [
- 13.40167,
- 52.52914
], - [
- 13.40188,
- 52.52895
], - [
- 13.398,
- 52.52885
], - [
- 13.39289,
- 52.52748
], - [
- 13.39354,
- 52.5264
], - [
- 13.39358,
- 52.52628
], - [
- 13.39324,
- 52.52575
], - [
- 13.39334,
- 52.52573
], - [
- 13.39339,
- 52.52584
]
], - "type": "LineString"
}, - {
- "coordinates": [
- [
- 13.39339,
- 52.52584
], - [
- 13.3934,
- 52.52599
], - [
- 13.39358,
- 52.52628
], - [
- 13.39354,
- 52.5264
], - [
- 13.39242,
- 52.52823
], - [
- 13.39381,
- 52.52852
], - [
- 13.38973,
- 52.53173
], - [
- 13.38717,
- 52.5315
], - [
- 13.38678,
- 52.5315
], - [
- 13.38641,
- 52.53147
], - [
- 13.38617,
- 52.53143
], - [
- 13.38607,
- 52.53155
], - [
- 13.38526,
- 52.53225
], - [
- 13.38501,
- 52.53252
], - [
- 13.38316,
- 52.53418
], - [
- 13.38179,
- 52.5355
], - [
- 13.38084,
- 52.53523
], - [
- 13.38081,
- 52.53531
], - [
- 13.3795,
- 52.53677
], - [
- 13.37941,
- 52.53682
], - [
- 13.37935,
- 52.53683
], - [
- 13.37919,
- 52.53682
], - [
- 13.37617,
- 52.5361
], - [
- 13.37502,
- 52.53698
], - [
- 13.37584,
- 52.53734
]
], - "type": "LineString"
}, - {
- "coordinates": [
- [
- 13.37584,
- 52.53734
], - [
- 13.37566,
- 52.53726
], - [
- 13.37515,
- 52.53763
], - [
- 13.37644,
- 52.53841
], - [
- 13.37807,
- 52.53935
], - [
- 13.37946,
- 52.5402
], - [
- 13.3796,
- 52.54019
], - [
- 13.37984,
- 52.54021
], - [
- 13.37988,
- 52.54012
], - [
- 13.38062,
- 52.53936
], - [
- 13.38169,
- 52.53832
], - [
- 13.38236,
- 52.5377
], - [
- 13.38363,
- 52.53661
], - [
- 13.38492,
- 52.53555
], - [
- 13.38613,
- 52.53447
], - [
- 13.38757,
- 52.53338
], - [
- 13.38791,
- 52.53354
], - [
- 13.38812,
- 52.53368
], - [
- 13.38833,
- 52.53392
], - [
- 13.38977,
- 52.53518
], - [
- 13.39003,
- 52.53539
], - [
- 13.39256,
- 52.53701
], - [
- 13.39316,
- 52.53739
], - [
- 13.39327,
- 52.53744
], - [
- 13.3936,
- 52.53757
], - [
- 13.40155,
- 52.53982
], - [
- 13.40357,
- 52.53715
], - [
- 13.40372,
- 52.53719
], - [
- 13.40465,
- 52.53727
], - [
- 13.4048,
- 52.53726
], - [
- 13.4059,
- 52.53736
], - [
- 13.40608,
- 52.53701
]
], - "type": "LineString"
}
], - "activities": [
- {
- "type": "start",
- "location_id": "berlin",
- "address": {
- "location_id": "berlin",
- "lat": 52.537,
- "lon": 13.406
}, - "end_time": 1554804329,
- "end_date_time": null,
- "distance": 0,
- "driving_time": 0,
- "preparation_time": 0,
- "waiting_time": 0,
- "load_after": [
- 0
]
}, - {
- "type": "service",
- "id": "s-2",
- "location_id": "13.393364_52.525851",
- "address": {
- "location_id": "13.393364_52.525851",
- "lat": 52.525851,
- "lon": 13.393364
}, - "arr_time": 1554804743,
- "arr_date_time": null,
- "end_time": 1554804743,
- "end_date_time": null,
- "waiting_time": 0,
- "distance": 1884,
- "driving_time": 414,
- "preparation_time": 0,
- "load_before": [
- 0
], - "load_after": [
- 1
]
}, - {
- "type": "service",
- "id": "s-1",
- "location_id": "13.375854_52.537338",
- "address": {
- "location_id": "13.375854_52.537338",
- "lat": 52.537338,
- "lon": 13.375854
}, - "arr_time": 1554805251,
- "arr_date_time": null,
- "end_time": 1554805329,
- "end_date_time": null,
- "waiting_time": 78,
- "distance": 4205,
- "driving_time": 922,
- "preparation_time": 0,
- "load_before": [
- 1
], - "load_after": [
- 2
]
}, - {
- "type": "end",
- "location_id": "berlin",
- "address": {
- "location_id": "berlin",
- "lat": 52.537,
- "lon": 13.406
}, - "arr_time": 1554806036,
- "arr_date_time": null,
- "distance": 7376,
- "driving_time": 1629,
- "preparation_time": 0,
- "waiting_time": 0,
- "load_before": [
- 2
]
}
]
}
], - "unassigned": {
- "services": [ ],
- "shipments": [ ],
- "breaks": [ ],
- "details": [ ]
}
}
}Introduction
The Routing API calculates the best path connecting two or more points, where the meaning of ''best'' depends on the vehicle profile and use case. Besides path coordinates it can return turn-by-turn instructions, elevation, path details and other useful information about the route.
Use our API Explorer to explore the Routing API.
Tutorials
- You can use the Routing API for navigation: have a look at our open source demo navigation application and adapt it to your needs. See also this blog post.
- See this blog post on how to retrieve information of the road segments or "per leg".
- Have a look into the
custom_modelFeature to modify existing vehicle profiles. See some examples here.
GET Route Endpoint
For the GET request you specify the parameters in the URL and can try it directly in every browser.
However, it has some disadvantages when using many points (URL length limit) and the custom_model Feature cannot be used.
Therefore, our recommended endpoint is the POST route endpoint.
query Parameters
| profile | string (VehicleProfileId) Default: "car" The routing profile. It determines the network, speed and other physical attributes used when computing the route. See the section about routing profiles for more details and valid profile values. |
| point required | Array of strings The points for which the route should be calculated. Format: Example: point=51.131,12.414&point=48.224,3.867 |
| point_hint | Array of strings The |
| snap_prevention | Array of strings Optional parameter to avoid snapping to a certain road class or road environment. Currently supported values are |
| curbside | Array of strings Optional parameter. It specifies on which side a point should be relative to the driver when she leaves/arrives at a start/target/via point. You need to specify this parameter for either none or all points. Only supported for motor vehicles and OpenStreetMap. |
| locale | string Default: "en" The locale of the resulting turn instructions. E.g. |
| elevation | boolean Default: false If |
| details | Array of strings Optional parameter. The following path details are available: |
| optimize | string Default: "false" Normally, the calculated route will visit the points in the order you specified them.
If you have more than two points, you can set this parameter to |
| instructions | boolean Default: true If instructions should be calculated and returned |
| calc_points | boolean Default: true If the points for the route should be calculated at all. |
| debug | boolean Default: false If |
| points_encoded | boolean Default: true Allows changing the encoding of location data in the response. The default is polyline encoding, which is compact
but requires special client code to unpack. (We provide it in our JavaScript client library!)
Set this parameter to |
| ch.disable | boolean Default: false Use this parameter in combination with one or more parameters from below. |
| heading | Array of integers <int32> Favour a heading direction for a certain point. Specify either one heading for the start point or as many as there are points.
In this case headings are associated by their order to the specific points. Headings are given as north based clockwise angle between 0 and 360 degree.
This parameter also influences the tour generated with |
| heading_penalty | integer <int32> Default: 120 Time penalty in seconds for not obeying a specified heading. Requires |
| pass_through | boolean Default: false If |
| algorithm | string Rather than looking for the shortest or fastest path, this parameter lets you solve two different problems related to routing:
With |
| round_trip.distance | integer <int32> Default: 10000 If |
| round_trip.seed | integer <int64> If |
| alternative_route.max_paths | integer <int32> Default: 2 If |
| alternative_route.max_weight_factor | number Default: 1.4 If |
| alternative_route.max_share_factor | number Default: 0.6 If |
Routing Result
Your request is not valid. For example, you specified too few or too many points.
Authentication necessary
API limit reached.
Internal server error. We get notified automatically and fix this asap.
- Curl
- Java
- JavaScript
- Python
- PHP
- Ruby
- C#
- Go
- Node.js
curl "https://graphhopper.com/api/1/route?point=51.131,12.414&point=48.224,3.867&profile=car&locale=de&calc_points=false&key=api_key"
- 200
- 400
- 401
- 429
- 500
{- "hints": {
- "visited_nodes.sum": 58,
- "visited_nodes.average": 58
}, - "info": {
- "copyrights": [
- "GraphHopper",
- "OpenStreetMap contributors"
], - "took": 2
}, - "paths": [
- {
- "distance": 1791.011,
- "weight": 307.852443,
- "time": 370962,
- "transfers": 0,
- "points_encoded": false,
- "bbox": [
- 11.539424,
- 48.118343,
- 11.558901,
- 48.122364
], - "points": {
- "type": "LineString",
- "coordinates": [
- [
- 11.539424,
- 48.118352
], - [
- 11.540387,
- 48.118368
], - [
- 11.54061,
- 48.118356
], - [
- 11.541941,
- 48.118409
], - [
- 11.543696,
- 48.118344
], - [
- 11.547167,
- 48.118343
], - [
- 11.548478,
- 48.118366
], - [
- 11.548487,
- 48.119329
], - [
- 11.548807,
- 48.119328
], - [
- 11.549408,
- 48.119366
], - [
- 11.550349,
- 48.119508
], - [
- 11.550441,
- 48.119473
], - [
- 11.551109,
- 48.119467
], - [
- 11.551553,
- 48.119445
], - [
- 11.551748,
- 48.119398
], - [
- 11.552087,
- 48.119475
], - [
- 11.552236,
- 48.119542
], - [
- 11.552353,
- 48.119635
], - [
- 11.553853,
- 48.121136
], - [
- 11.555448,
- 48.12039
], - [
- 11.555797,
- 48.120206
], - [
- 11.55632,
- 48.120592
], - [
- 11.556716,
- 48.120919
], - [
- 11.557326,
- 48.121345
], - [
- 11.558901,
- 48.122364
]
]
}, - "instructions": [
- {
- "distance": 672.954,
- "heading": 89.04,
- "sign": 0,
- "interval": [
- 0,
- 6
], - "text": "Continue onto Lindenschmitstraße",
- "time": 144703,
- "street_name": "Lindenschmitstraße"
}, - {
- "distance": 107.145,
- "sign": -2,
- "interval": [
- 6,
- 7
], - "text": "Turn left",
- "time": 22675,
- "street_name": ""
}, - {
- "distance": 140.169,
- "sign": 2,
- "interval": [
- 7,
- 10
], - "text": "Turn right onto Oberländerstraße",
- "time": 28032,
- "street_name": "Oberländerstraße"
}, - {
- "distance": 360.232,
- "sign": 1,
- "interval": [
- 10,
- 18
], - "text": "Turn slight right",
- "time": 72677,
- "street_name": ""
}, - {
- "distance": 177.621,
- "sign": 2,
- "interval": [
- 18,
- 20
], - "text": "Turn right onto Thalkirchner Straße",
- "time": 35524,
- "street_name": "Thalkirchner Straße"
}, - {
- "distance": 332.89,
- "sign": -2,
- "interval": [
- 20,
- 24
], - "text": "Turn left onto Thalkirchner Straße",
- "time": 67351,
- "street_name": "Thalkirchner Straße"
}, - {
- "distance": 0,
- "sign": 4,
- "last_heading": 45.67046584987792,
- "interval": [
- 24,
- 24
], - "text": "Arrive at destination",
- "time": 0,
- "street_name": ""
}
], - "legs": [ ],
- "details": { },
- "ascend": 6.3294677734375,
- "descend": 25.0579833984375,
- "snapped_waypoints": {
- "type": "LineString",
- "coordinates": [
- [
- 11.539424,
- 48.118352
], - [
- 11.558901,
- 48.122364
]
]
}
}
]
}POST Route Endpoint
To do a request you send JSON data.
See the GET endpoint for an alternative query method which is slightly simpler to get started but has some disadvantages.
Please note that in contrast to the GET endpoint, points are specified in the order of [longitude, latitude] and some parameter names use the plural.
For example the string point=10,11&point=20,22 will be converted to the points array (plural):
{ "points": [[11,10], [22,20]] }
So this points array uses a format similar to GeoJson.
Example:
curl -X POST -H "Content-Type: application/json" "https://graphhopper.com/api/1/route?key=[YOUR_KEY]" -d '{"elevation":false,"points":[[-0.087891,51.534377],[-0.090637,51.467697]],"profile":"car"}'
Request Body schema: application/json
| profile | string (VehicleProfileId) The routing profile. It determines the network, speed and other physical attributes used when computing the route. See the section about routing profiles for more details and valid profile values. |
| points | Array of numbers The points for the route in an array of |
| point_hints | Array of strings Optional parameter. Specifies a hint for each point in the |
| snap_preventions | Array of strings Optional parameter to avoid snapping to a certain road class or road environment. Current supported values |
| curbsides | Array of strings Optional parameter. It specifies on which side a point should be relative to the driver when she leaves/arrives at a start/target/via point. You need to specify this parameter for either none or all points. Only supported for motor vehicle profiles and OpenStreetMap. |
| locale | string Default: "en" The locale of the resulting turn instructions. E.g. |
| elevation | boolean Default: false If |
| details | Array of strings Optional parameter. The following path details are available: |
| optimize | string Default: "false" Normally, the calculated route will visit the points in the order you specified them.
If you have more than two points, you can set this parameter to |
| instructions | boolean Default: true If instructions should be calculated and returned |
| calc_points | boolean Default: true If the points for the route should be calculated at all. |
| debug | boolean Default: false If |
| points_encoded | boolean Default: true Allows changing the encoding of location data in the response. The default is polyline encoding, which is compact
but requires special client code to unpack. (We provide it in our JavaScript client library!)
Set this parameter to |
| ch.disable | boolean Default: false Use this parameter in combination with one or more parameters from below. |
object (CustomModel) The custom_model modifies the routing behaviour of the specified profile. See the detailed documentation.
Below is a complete request example in Berlin that limits all speeds to 100km/h, excludes motorways and makes shorter routes a bit more likely than the default due to a higher distance_influence.
Note that it also includes the | |
| headings | Array of integers <int32> Favour a heading direction for a certain point. Specify either one heading for the start point or as many as there are points.
In this case headings are associated by their order to the specific points. Headings are given as north based clockwise angle between 0 and 360 degree.
This parameter also influences the tour generated with |
| heading_penalty | integer <int32> Default: 120 Time penalty in seconds for not obeying a specified heading. Requires |
| pass_through | boolean Default: false If |
| algorithm | string Rather than looking for the shortest or fastest path, this parameter lets you solve two different problems related to routing:
With |
| round_trip.distance | integer <int32> Default: 10000 If |
| round_trip.seed | integer <int64> If |
| alternative_route.max_paths | integer <int32> Default: 2 If |
| alternative_route.max_weight_factor | number Default: 1.4 If |
| alternative_route.max_share_factor | number Default: 0.6 If |
Routing Result
Your request is not valid. For example, you specified too few or too many points.
Authentication necessary
API limit reached.
Internal server error. We get notified automatically and fix this asap.
- Payload
- curl
- JavaScript
- Python
- PHP
- Ruby
- C#
- Go
- Node.js
{- "profile": "bike",
- "points": [
- [
- 11.539421,
- 48.118477
], - [
- 11.559023,
- 48.12228
]
], - "point_hints": [
- "Lindenschmitstraße",
- "Thalkirchener Str."
], - "snap_preventions": [
- "motorway",
- "ferry",
- "tunnel"
], - "details": [
- "road_class",
- "surface"
]
}- 200
- 400
- 401
- 429
- 500
{- "hints": {
- "visited_nodes.sum": 58,
- "visited_nodes.average": 58
}, - "info": {
- "copyrights": [
- "GraphHopper",
- "OpenStreetMap contributors"
], - "took": 2
}, - "paths": [
- {
- "distance": 1791.011,
- "weight": 307.852443,
- "time": 370962,
- "transfers": 0,
- "points_encoded": false,
- "bbox": [
- 11.539424,
- 48.118343,
- 11.558901,
- 48.122364
], - "points": {
- "type": "LineString",
- "coordinates": [
- [
- 11.539424,
- 48.118352
], - [
- 11.540387,
- 48.118368
], - [
- 11.54061,
- 48.118356
], - [
- 11.541941,
- 48.118409
], - [
- 11.543696,
- 48.118344
], - [
- 11.547167,
- 48.118343
], - [
- 11.548478,
- 48.118366
], - [
- 11.548487,
- 48.119329
], - [
- 11.548807,
- 48.119328
], - [
- 11.549408,
- 48.119366
], - [
- 11.550349,
- 48.119508
], - [
- 11.550441,
- 48.119473
], - [
- 11.551109,
- 48.119467
], - [
- 11.551553,
- 48.119445
], - [
- 11.551748,
- 48.119398
], - [
- 11.552087,
- 48.119475
], - [
- 11.552236,
- 48.119542
], - [
- 11.552353,
- 48.119635
], - [
- 11.553853,
- 48.121136
], - [
- 11.555448,
- 48.12039
], - [
- 11.555797,
- 48.120206
], - [
- 11.55632,
- 48.120592
], - [
- 11.556716,
- 48.120919
], - [
- 11.557326,
- 48.121345
], - [
- 11.558901,
- 48.122364
]
]
}, - "instructions": [
- {
- "distance": 672.954,
- "heading": 89.04,
- "sign": 0,
- "interval": [
- 0,
- 6
], - "text": "Continue onto Lindenschmitstraße",
- "time": 144703,
- "street_name": "Lindenschmitstraße"
}, - {
- "distance": 107.145,
- "sign": -2,
- "interval": [
- 6,
- 7
], - "text": "Turn left",
- "time": 22675,
- "street_name": ""
}, - {
- "distance": 140.169,
- "sign": 2,
- "interval": [
- 7,
- 10
], - "text": "Turn right onto Oberländerstraße",
- "time": 28032,
- "street_name": "Oberländerstraße"
}, - {
- "distance": 360.232,
- "sign": 1,
- "interval": [
- 10,
- 18
], - "text": "Turn slight right",
- "time": 72677,
- "street_name": ""
}, - {
- "distance": 177.621,
- "sign": 2,
- "interval": [
- 18,
- 20
], - "text": "Turn right onto Thalkirchner Straße",
- "time": 35524,
- "street_name": "Thalkirchner Straße"
}, - {
- "distance": 332.89,
- "sign": -2,
- "interval": [
- 20,
- 24
], - "text": "Turn left onto Thalkirchner Straße",
- "time": 67351,
- "street_name": "Thalkirchner Straße"
}, - {
- "distance": 0,
- "sign": 4,
- "last_heading": 45.67046584987792,
- "interval": [
- 24,
- 24
], - "text": "Arrive at destination",
- "time": 0,
- "street_name": ""
}
], - "legs": [ ],
- "details": { },
- "ascend": 6.3294677734375,
- "descend": 25.0579833984375,
- "snapped_waypoints": {
- "type": "LineString",
- "coordinates": [
- [
- 11.539424,
- 48.118352
], - [
- 11.558901,
- 48.122364
]
]
}
}
]
}Compute a matrix
For N origins and M destinations, compute routes from all origins to all destinations and output the result as a matrix of travel times and/or distances.
This includes the common cases of routes from one origin to many destinations, or from many origins to one destination.
Request Body schema: application/json
| profile | string (VehicleProfileId) The routing profile. It determines the network, speed and other physical attributes used when computing the route. See the section about routing profiles for more details and valid profile values. |
| from_points | Array of numbers The origin points for the routes in an array of |
| to_points | Array of numbers The destination points for the routes in an array of |
| from_point_hints | Array of strings See |
| to_point_hints | Array of strings See |
| snap_preventions | Array of strings See |
| from_curbsides | Array of strings See |
| to_curbsides | Array of strings See |
| out_arrays | Array of strings Specifies which matrices should be included in the response. Specify one or more of the following options |
| fail_fast | boolean Default: true Specifies whether or not the matrix calculation should return with an error as soon as possible in case some points cannot be found or some points are not connected. If set to |
Matrix API response
- Payload
- curl
- JavaScript
- Python
- PHP
- Ruby
- C#
- Go
- Node.js
{- "from_points": [
- [
- -0.11379003524780275,
- 51.53664617804063
], - [
- -0.10866165161132814,
- 51.538621486960956
], - [
- -0.11059284210205078,
- 51.53245503603458
]
], - "to_points": [
- [
- -0.09576559066772462,
- 51.512882367963456
], - [
- -0.08797645568847656,
- 51.51317615367198
]
], - "from_point_hints": [
- "Copenhagen Street",
- "Richmond Avenue",
- "White Lion Street"
], - "to_point_hints": [
- "Cannon",
- "Cornhill"
], - "out_arrays": [
- "weights",
- "times",
- "distances"
], - "vehicle": "car"
}- 200
{- "distances": [
- [
- 0,
- 97653,
- 48887
], - [
- 97426,
- 0,
- 121035
], - [
- 49006,
- 121049,
- 0
]
], - "times": [
- [
- 0,
- 4197,
- 2994
], - [
- 4192,
- 0,
- 6074
], - [
- 3006,
- 6062,
- 0
]
], - "weights": [
- [
- 0,
- 5662.551,
- 3727.147
], - [
- 5653.807,
- 0,
- 7889.653
], - [
- 3741.528,
- 7878.365,
- 0
]
], - "info": {
- "copyrights": [
- "GraphHopper",
- "OpenStreetMap contributors"
]
}
}Compute a matrix
For N origins and M destinations, compute routes from all origins to all destinations and output the result as a matrix of travel times and/or distances.
This includes the common cases of routes from one origin to many destinations, or from many origins to one destination.
query Parameters
| profile | string (VehicleProfileId) Default: "car" The routing profile. It determines the network, speed and other physical attributes used when computing the route. See the section about routing profiles for more details and valid profile values. |
| point | Array of strings Specify multiple points in |
| from_point | Array of strings The origin points for the routes in |
| to_point | Array of strings The destination points for the routes in |
| point_hint | Array of strings Optional parameter. Specifies a hint for each |
| from_point_hint | Array of strings For the from_point parameter. See point_hint |
| to_point_hint | Array of strings For the to_point parameter. See point_hint |
| snap_prevention | Array of strings Optional parameter to avoid snapping to a certain road class or road environment. Current supported values |
| curbside | Array of strings Optional parameter. It specifies on which side a point should be relative to the driver when she leaves/arrives at a start/target/via point. You need to specify this parameter for either none or all points. Only supported for motor vehicles and OpenStreetMap. |
| from_curbside | Array of strings Curbside setting for the from_point parameter. See curbside. |
| to_curbside | Array of strings Curbside setting for the to_point parameter. See curbside. |
| out_array | Array of strings Specifies which arrays should be included in the response. Specify one or more of the following options 'weights', 'times', 'distances'. To specify more than one array use e.g. out_array=times&out_array=distances. The units of the entries of distances are meters, of times are seconds and of weights is arbitrary and it can differ for different vehicles or versions of this API. |
| fail_fast | boolean Default: true Specifies whether or not the matrix calculation should return with an error as soon as possible in case some points cannot be found or some points are not connected. If set to |
Matrix API response
- Curl
- Java
- JavaScript
- Python
- PHP
- Ruby
- C#
- Go
- Node.js
curl "https://graphhopper.com/api/1/matrix?point=49.932707,11.588051&point=50.241935,10.747375&point=50.118817,11.983337&type=json&profile=car&out_array=weights&out_array=times&out_array=distances&key=api_key"
- 200
{- "distances": [
- [
- 0,
- 97653,
- 48887
], - [
- 97426,
- 0,
- 121035
], - [
- 49006,
- 121049,
- 0
]
], - "times": [
- [
- 0,
- 4197,
- 2994
], - [
- 4192,
- 0,
- 6074
], - [
- 3006,
- 6062,
- 0
]
], - "weights": [
- [
- 0,
- 5662.551,
- 3727.147
], - [
- 5653.807,
- 0,
- 7889.653
], - [
- 3741.528,
- 7878.365,
- 0
]
], - "info": {
- "copyrights": [
- "GraphHopper",
- "OpenStreetMap contributors"
]
}
}Submit a matrix computation job
An alternate endpoint for computing a large matrix asynchronously, where a request against the regular endpoint would result in a timeout.
The request format is the same, but instead of the result, you are given a job identification number that you can use to retrieve the result once it is available.
In most cases, prefer the regular endpoints.
Here are some full examples via curl:
$ curl -X POST -H "Content-Type: application/json" "https://graphhopper.com/api/1/matrix/calculate?key=[YOUR_KEY]" -d '{"points":[[13.29895,52.48696],[13.370876,52.489575],[13.439026,52.511206]]}'
{"job_id":"7ac65787-fb99-4e02-a832-2c3010c70097"}
Pick the returned job_id and use it in the next GET requests:
$ curl -X GET "https://graphhopper.com/api/1/matrix/solution/7ac65787-fb99-4e02-a832-2c3010c70097?key=[YOUR_KEY]"
{"status":"waiting"}
When the calculation is finished (status:finished) the JSON response will contain the full matrix JSON under solution:
$ curl -X GET "https://graphhopper.com/api/1/matrix/solution/7ac65787-fb99-4e02-a832-2c3010c70097?key=[YOUR_KEY]"
{"solution":{"weights":[[0.0,470.453,945.414],[503.793,0.0,580.871],[970.49,569.511,0.0]],"info":{"copyrights":["GraphHopper","OpenStreetMap contributors"]}},"status":"finished"}
Please note that if an error occured while calculation the JSON will not have a status but contain directly the error message e.g.:
{"message":"Cannot find from_points: 1"}
And the optional hints array.
Request Body schema: application/json
| profile | string (VehicleProfileId) The routing profile. It determines the network, speed and other physical attributes used when computing the route. See the section about routing profiles for more details and valid profile values. |
| from_points | Array of numbers The origin points for the routes in an array of |
| to_points | Array of numbers The destination points for the routes in an array of |
| from_point_hints | Array of strings See |
| to_point_hints | Array of strings See |
| snap_preventions | Array of strings See |
| from_curbsides | Array of strings See |
| to_curbsides | Array of strings See |
| out_arrays | Array of strings Specifies which matrices should be included in the response. Specify one or more of the following options |
| fail_fast | boolean Default: true Specifies whether or not the matrix calculation should return with an error as soon as possible in case some points cannot be found or some points are not connected. If set to |
A jobId you can use to retrieve your solution from the server.
- Payload
- curl
- JavaScript
- Python
- PHP
- Ruby
- C#
- Go
- Node.js
{- "from_points": [
- [
- -0.11379003524780275,
- 51.53664617804063
], - [
- -0.10866165161132814,
- 51.538621486960956
], - [
- -0.11059284210205078,
- 51.53245503603458
]
], - "to_points": [
- [
- -0.09576559066772462,
- 51.512882367963456
], - [
- -0.08797645568847656,
- 51.51317615367198
]
], - "from_point_hints": [
- "Copenhagen Street",
- "Richmond Avenue",
- "White Lion Street"
], - "to_point_hints": [
- "Cannon",
- "Cornhill"
], - "out_arrays": [
- "weights",
- "times",
- "distances"
], - "vehicle": "car"
}- 200
{- "job_id": "44886560-b584-4da5-b245-768151dacd8f"
}Retrieve result of a matrix computation job
A response containing the matrix
- curl
- JavaScript
- Python
- PHP
- Ruby
- C#
- Go
- Node.js
- 200
{- "solution": {
- "distances": [
- [
- 0,
- 97653,
- 48887
], - [
- 97426,
- 0,
- 121035
], - [
- 49006,
- 121049,
- 0
]
], - "times": [
- [
- 0,
- 4197,
- 2994
], - [
- 4192,
- 0,
- 6074
], - [
- 3006,
- 6062,
- 0
]
], - "weights": [
- [
- 0,
- 5662.551,
- 3727.147
], - [
- 5653.807,
- 0,
- 7889.653
], - [
- 3741.528,
- 7878.365,
- 0
]
], - "info": {
- "copyrights": [
- "GraphHopper",
- "OpenStreetMap contributors"
]
}
}
}Geocoding Endpoint
Introduction
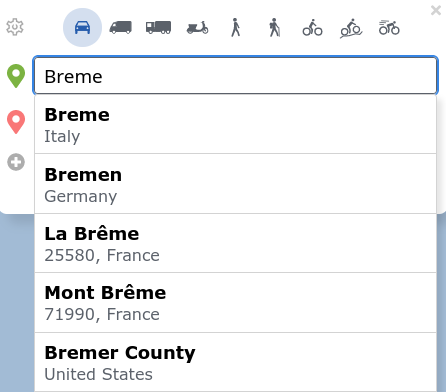
Geocoding describes the process of transforming an textual address representation to a coordinate (latitude,longitude).
For example the conversion from Berlin to 52.5170365,13.3888599.
Reverse geocoding converts a coordinate to a textual address representation or place name. Find out more about Geocoding itself on Wikipedia.
query Parameters
| q | string If you do forward geocoding, this is |
| locale | string Default: "en" Display the search results for the specified locale. Currently French (fr), English (en) and German (de) are explicitly supported. Otherwise leave the locale empty. |
| limit | integer <int32> Default: 5 Specify the maximum number of results to return |
| reverse | boolean Default: false It is |
| debug | boolean Default: false If |
| point | string Forward geocoding: The location bias in the format 'latitude,longitude' e.g. point=45.93272,11.58803. Reverse geocoding: The location to find amenities, cities. |
| provider | string Default: "default" The provider parameter is currently under development and can fall back to The credit costs can be different for all providers - see here for more information about it. Currently, only the default provider and gisgraphy supports autocompletion of partial search strings. All providers support normal "forward" geocoding and reverse geocoding via Default (
|
An array found locations
- Curl
- Java
- JavaScript
- Python
- PHP
- Ruby
- C#
- Go
- Node.js
curl "https://graphhopper.com/api/1/geocode?q=berlin&locale=de&key=api_key"
- 200
{- "hits": [
- {
- "osm_id": 240109189,
- "osm_type": "N",
- "country": "Deutschland",
- "osm_key": "place",
- "city": "Berlin",
- "osm_value": "city",
- "postcode": "10117",
- "name": "Berlin",
- "point": {
- "lng": 13.3888599,
- "lat": 52.5170365
}
}, - {
- "osm_id": 62422,
- "osm_type": "R",
- "extent": [
- 13.088345,
- 52.6755087,
- 13.7611609,
- 52.33826
], - "country": "Deutschland",
- "osm_key": "place",
- "osm_value": "city",
- "name": "Berlin",
- "point": {
- "lng": 13.4385964,
- "lat": 52.5198535
}
}, - {
- "osm_id": 120456814,
- "osm_type": "W",
- "extent": [
- 13.3906703,
- 52.5200704,
- 13.3948873,
- 52.5175007
], - "country": "Deutschland",
- "osm_key": "amenity",
- "city": "Berlin",
- "street": "Dorotheenstraße",
- "osm_value": "university",
- "postcode": "10117",
- "name": "Humboldt-Universität zu Berlin",
- "point": {
- "lng": 13.393560493637775,
- "lat": 52.51875685
}
}, - {
- "osm_id": 6647,
- "osm_type": "R",
- "extent": [
- 13.3924346,
- 52.5191829,
- 13.3948768,
- 52.517526
], - "country": "Deutschland",
- "osm_key": "building",
- "housenumber": "6",
- "city": "Berlin",
- "street": "Unter den Linden",
- "osm_value": "yes",
- "postcode": "10117",
- "name": "Humboldt-Universität zu Berlin",
- "point": {
- "lng": 13.392908021752554,
- "lat": 52.51840935
}
}, - {
- "osm_id": 38862723,
- "osm_type": "W",
- "extent": [
- 13.2364563,
- 52.5161915,
- 13.2433375,
- 52.5129557
], - "country": "Deutschland",
- "osm_key": "leisure",
- "housenumber": "3",
- "city": "Berlin",
- "street": "Olympischer Platz",
- "osm_value": "stadium",
- "postcode": "14053",
- "name": "Olympiastadion Berlin",
- "point": {
- "lng": 13.239776301622072,
- "lat": 52.5147077
}
}, - {
- "osm_id": 583306346,
- "osm_type": "W",
- "extent": [
- 13.3739245,
- 52.528547,
- 13.3818019,
- 52.5229778
], - "country": "Deutschland",
- "osm_key": "amenity",
- "city": "Berlin",
- "street": "Hufelandweg",
- "osm_value": "hospital",
- "postcode": "10117",
- "name": "Charité Universitätsmedizin Berlin",
- "point": {
- "lng": 13.377739577932736,
- "lat": 52.52585125
}
}, - {
- "osm_id": 180594,
- "osm_type": "R",
- "extent": [
- 13.3906159,
- 52.5190301,
- 13.3923847,
- 52.5174089
], - "country": "Deutschland",
- "osm_key": "amenity",
- "housenumber": "8",
- "city": "Berlin",
- "street": "Unter den Linden",
- "osm_value": "library",
- "postcode": "10117",
- "name": "Staatsbibliothek zu Berlin",
- "point": {
- "lng": 13.391516532100738,
- "lat": 52.5182233
}
}, - {
- "osm_id": 3856100103,
- "osm_type": "N",
- "country": "Deutschland",
- "osm_key": "railway",
- "city": "Berlin",
- "street": "Washingtonplatz",
- "osm_value": "station",
- "postcode": "10557",
- "name": "Berlin Hauptbahnhof",
- "point": {
- "lng": 13.3696614,
- "lat": 52.5249451
}
}, - {
- "osm_id": 1078631331,
- "osm_type": "N",
- "country": "Deutschland",
- "osm_key": "historic",
- "city": "Berlin",
- "street": "Gertrud-Kolmar-Straße",
- "osm_value": "battlefield",
- "postcode": "10117",
- "name": "Schlacht um Berlin",
- "point": {
- "lng": 13.3814231,
- "lat": 52.5127537
}
}, - {
- "osm_id": 1154556,
- "osm_type": "R",
- "extent": [
- 13.3807495,
- 52.5083344,
- 13.3822459,
- 52.5074359
], - "country": "Deutschland",
- "osm_key": "office",
- "housenumber": "5",
- "city": "Berlin",
- "street": "Niederkirchnerstraße",
- "osm_value": "government",
- "postcode": "10117",
- "name": "Abgeordnetenhaus von Berlin",
- "point": {
- "lng": 13.381504320489928,
- "lat": 52.50786655
}
}
], - "took": 37
}Isochrone Endpoint
Example
You can get an example response via:
curl "https://graphhopper.com/api/1/isochrone?point=51.131108,12.414551&key=[YOUR_KEY]"
Don't forget to replace the placeholder with your own key.
Introduction
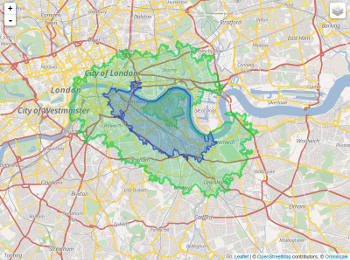
An isochrone of a location is ''a line connecting points at which a vehicle arrives at the same time'', see Wikipedia. With the same API you can also calculate isodistances, just use the parameter distance_limit instead of time_limit`.
Use Cases
Some possible areas in which this API may be useful to you:
- real estate analysis
- realtors
- vehicle scheduling
- geomarketing
- reach of electric vehicles
- transport planning
- logistics (distribution and retail network planning)
API Clients and Examples
See the clients section in the main documentation, and our API explorer.
query Parameters
| point required | string Specify the start coordinate |
| time_limit | integer <int32> Default: 600 Specify which time the vehicle should travel. In seconds. |
| distance_limit | integer <int32> Specify which distance the vehicle should travel. In meters. |
| profile | string (VehicleProfileId) Default: "car" The routing profile. It determines the network, speed and other physical attributes used when computing the route. See the section about routing profiles for more details and valid profile values. |
| buckets | integer <int32> Default: 1 Number by which to divide the given |
| reverse_flow | boolean Default: false If |
Isochrone Result
- curl
- JavaScript
- Python
- PHP
- Ruby
- C#
- Go
- Node.js
- 200
{- "polygons": [
- {
- "properties": {
- "bucket": 0
}, - "type": "Feature",
- "geometry": {
- "type": "Polygon",
- "coordinates": [
- [
- 13.351851,
- 52.51345
], - [
- 13.350402,
- 52.516949
], - [
- 13.352598,
- 52.522252
], - [
- 13.351851,
- 52.51345
]
]
}
}
]
}Map-match a GPX file
Example
You get an example response for a GPX via:
curl -XPOST -H "Content-Type: application/gpx+xml" "https://graphhopper.com/api/1/match?profile=car&key=[YOUR_KEY]" --data @/path/to/some.gpx
A minimal working GPX file looks like
<gpx>
 <trk>
  <trkseg>
   <trkpt lat="51.343657" lon="12.360708"></trkpt>
   <trkpt lat="51.343796" lon="12.361337"></trkpt>
   <trkpt lat="51.342784" lon="12.361882"></trkpt>
  </trkseg>
 </trk>
</gpx>
Introduction
The Map Matching API is part of the GraphHopper Directions API and with this API you can snap measured GPS points typically as GPX files to a digital road network to e.g. clean data or attach certain data like elevation or turn instructions to it. Read more at Wikipedia.
In the example screenshot above and demo you see the Map Matching API in action where the black line is the GPS track and the green one is matched result.
To get a match response you send a GPX file in the body of an HTTP POST request and specify request parameters like the key and profile in the URL.
See below for more supported parameters.
API Clients and Examples
See the clients section in the main documentation, and our API explorer.
Limits and Counts
The cost for one request depends on the number of GPS location and is documented here.
One request should not exceed the Map Matching API location limit depending on the package, see the pricing in our dashboard.
query Parameters
| gps_accuracy | integer Specify the precision of a point, in meter |
| profile | string (VehicleProfileId) Default: "car" The routing profile. It determines the network, speed and other physical attributes used when computing the route. See the section about routing profiles for more details and valid profile values. |
| locale | string Default: "en" The locale of the resulting turn instructions. E.g. |
| elevation | boolean Default: false If |
| details | Array of strings Optional parameter. The following path details are available: |
| instructions | boolean Default: true If instructions should be calculated and returned |
| calc_points | boolean Default: true If the points for the route should be calculated at all. |
| points_encoded | boolean Default: true Allows changing the encoding of location data in the response. The default is polyline encoding, which is compact
but requires special client code to unpack. (We provide it in our JavaScript client library!)
Set this parameter to |
Map matching result
- curl
- JavaScript
- Python
- PHP
- Ruby
- C#
- Go
- Node.js
- 200
{- "hints": {
- "visited_nodes.sum": 58,
- "visited_nodes.average": 58
}, - "info": {
- "copyrights": [
- "GraphHopper",
- "OpenStreetMap contributors"
], - "took": 2
}, - "paths": [
- {
- "distance": 1791.011,
- "weight": 307.852443,
- "time": 370962,
- "transfers": 0,
- "points_encoded": false,
- "bbox": [
- 11.539424,
- 48.118343,
- 11.558901,
- 48.122364
], - "points": {
- "type": "LineString",
- "coordinates": [
- [
- 11.539424,
- 48.118352
], - [
- 11.540387,
- 48.118368
], - [
- 11.54061,
- 48.118356
], - [
- 11.541941,
- 48.118409
], - [
- 11.543696,
- 48.118344
], - [
- 11.547167,
- 48.118343
], - [
- 11.548478,
- 48.118366
], - [
- 11.548487,
- 48.119329
], - [
- 11.548807,
- 48.119328
], - [
- 11.549408,
- 48.119366
], - [
- 11.550349,
- 48.119508
], - [
- 11.550441,
- 48.119473
], - [
- 11.551109,
- 48.119467
], - [
- 11.551553,
- 48.119445
], - [
- 11.551748,
- 48.119398
], - [
- 11.552087,
- 48.119475
], - [
- 11.552236,
- 48.119542
], - [
- 11.552353,
- 48.119635
], - [
- 11.553853,
- 48.121136
], - [
- 11.555448,
- 48.12039
], - [
- 11.555797,
- 48.120206
], - [
- 11.55632,
- 48.120592
], - [
- 11.556716,
- 48.120919
], - [
- 11.557326,
- 48.121345
], - [
- 11.558901,
- 48.122364
]
]
}, - "instructions": [
- {
- "distance": 672.954,
- "heading": 89.04,
- "sign": 0,
- "interval": [
- 0,
- 6
], - "text": "Continue onto Lindenschmitstraße",
- "time": 144703,
- "street_name": "Lindenschmitstraße"
}, - {
- "distance": 107.145,
- "sign": -2,
- "interval": [
- 6,
- 7
], - "text": "Turn left",
- "time": 22675,
- "street_name": ""
}, - {
- "distance": 140.169,
- "sign": 2,
- "interval": [
- 7,
- 10
], - "text": "Turn right onto Oberländerstraße",
- "time": 28032,
- "street_name": "Oberländerstraße"
}, - {
- "distance": 360.232,
- "sign": 1,
- "interval": [
- 10,
- 18
], - "text": "Turn slight right",
- "time": 72677,
- "street_name": ""
}, - {
- "distance": 177.621,
- "sign": 2,
- "interval": [
- 18,
- 20
], - "text": "Turn right onto Thalkirchner Straße",
- "time": 35524,
- "street_name": "Thalkirchner Straße"
}, - {
- "distance": 332.89,
- "sign": -2,
- "interval": [
- 20,
- 24
], - "text": "Turn left onto Thalkirchner Straße",
- "time": 67351,
- "street_name": "Thalkirchner Straße"
}, - {
- "distance": 0,
- "sign": 4,
- "last_heading": 45.67046584987792,
- "interval": [
- 24,
- 24
], - "text": "Arrive at destination",
- "time": 0,
- "street_name": ""
}
], - "legs": [ ],
- "details": { },
- "ascend": 6.3294677734375,
- "descend": 25.0579833984375,
- "snapped_waypoints": {
- "type": "LineString",
- "coordinates": [
- [
- 11.539424,
- 48.118352
], - [
- 11.558901,
- 48.122364
]
]
}
}
]
}Introduction
It solves the “capacity clustering problem” by assigning a set of customers to a given number of distinct groups (called clusters). The API “clusters” by minimizing the total distance from each individual customer to its designated group median. It can also consider minimum and maximum capacity restrictions for each group.
Clustering can be used in many practical applications. For example, it can help to plan territories, i.e. territory optimization for field teams with large territories for field workers, or to solve large vehicle routing problems (VRP).
Try the Cluster API in our API Explorer!
The idea is to divide a certain number of customers, a pre-specified number of clusters. As already written above, a distribution is sought that minimizes the total cost (e.g. distance or time or a function of distance and time). We currently support two approaches.
You can simply define a certain number of clusters via configuration ("clustering" with empty set of "clusters") and additionally how many customers should be in such a cluster. This is defined by an upper and lower limit ("min_quantity" and "max_quantity). The algorithm then searches for suitable clusters and divides the customers into these clusters.
You can explicitly define clusters via "clusters". In this way, each individual cluster can be defined. This approach not only allows each cluster to have its own capacity upper and lower bound, but each cluster can also be assigned a fixed cluster center. In contrast to 1. the algorithm then does not search for a suitable center, but assigns the customers given the fixed centers to each cluster. Note that if you define clusters explicitly, any configuration of "clustering" will be overwritten by these explicit clusters.
POST Cluster Endpoint
The Cluster endpoint is used with a POST request towards
https://graphhopper.com/api/1/cluster?key=<your_key>. The solution will be provided in the JSON response.
Please note that for problems that take longer than 10 seconds a bad request error is returned.
In this case please use the asynchronous Batch Cluster Endpoint instead.
Request Body schema: application/jsonrequired
Request object that contains the problem to be solved
object (ClusterConfiguration) | |
Array of objects (Clusters) | |
Array of objects (ClusterCustomer) |
A response containing the solution
Error occurred when reading the request. Request is invalid.
Error occurred on server side.
- Payload
- curl
- JavaScript
- Python
- PHP
- Ruby
- C#
- Go
- Node.js
{- "configuration": {
- "response_type": "json",
- "routing": {
- "profile": "car",
- "cost_per_second": 1,
- "cost_per_meter": 0
}, - "clustering": {
- "num_clusters": 10,
- "max_quantity": 50,
- "min_quantity": 30
}
}, - "clusters": [
- {
- "name": "GraphHopper GmbH",
- "center": {
- "lon": 11.53941,
- "lat": 48.118434,
- "street_hint": "Lindenschmitstraße 52"
}, - "min_quantity": 10,
- "max_quantity": 10
}
], - "customers": [
- {
- "id": "GraphHopper GmbH",
- "address": {
- "lon": 11.53941,
- "lat": 48.118434,
- "street_hint": "Lindenschmitstraße 52"
}, - "quantity": 10
}
]
}- 200
- 400
- 500
{- "copyrights": [
- "GraphHopper",
- "OpenStreetMap contributors"
], - "status": "finished",
- "waiting_time_in_queue": 0,
- "processing_time": 4900,
- "clusters": [
- {
- "quantity": 40,
- "ids": [
- "GraphHopper GmbH"
]
}
]
}Batch Cluster Endpoint
Prefer the synchronous endpoint and use this Batch Cluster endpoint for long running problems only. The work flow is asynchronous:
- send a POST request towards
https://graphhopper.com/api/1/cluster/calculate?key=<your_key>and fetch the job_id. - poll the solution every 500ms until it gives
status=finished. Do this with a GET request towardshttps://graphhopper.com/api/1/cluster/solution/<job_id>?key=<your_key>.
Request Body schema: application/jsonrequired
Request object that contains the problem to be solved
object (ClusterConfiguration) | |
Array of objects (Clusters) | |
Array of objects (ClusterCustomer) |
A jobId you can use to retrieve your solution from the server - see solution endpoint.
Error occurred when reading client request. Request is invalid.
Error occurred on server side.
- Payload
- curl
- JavaScript
- Python
- PHP
- Ruby
- C#
- Go
- Node.js
{- "configuration": {
- "response_type": "json",
- "routing": {
- "profile": "car",
- "cost_per_second": 1,
- "cost_per_meter": 0
}, - "clustering": {
- "num_clusters": 10,
- "max_quantity": 50,
- "min_quantity": 30
}
}, - "clusters": [
- {
- "name": "GraphHopper GmbH",
- "center": {
- "lon": 11.53941,
- "lat": 48.118434,
- "street_hint": "Lindenschmitstraße 52"
}, - "min_quantity": 10,
- "max_quantity": 10
}
], - "customers": [
- {
- "id": "GraphHopper GmbH",
- "address": {
- "lon": 11.53941,
- "lat": 48.118434,
- "street_hint": "Lindenschmitstraße 52"
}, - "quantity": 10
}
]
}- 200
- 400
- 500
{- "job_id": "44886560-b584-4da5-b245-768151dacd8f"
}GET Batch Solution Endpoint
This endpoint returns the solution of the clustering problems submitted to the Batch Cluster endpoint. You can fetch it with the job_id, you have been sent.
A response containing the solution
Error occurred on client side such as invalid input.
Requested solution could not be found.
Error occurred on server side.
- curl
- JavaScript
- Python
- PHP
- Ruby
- C#
- Go
- Node.js
- 200
- 400
- 404
{- "copyrights": [
- "GraphHopper",
- "OpenStreetMap contributors"
], - "status": "finished",
- "waiting_time_in_queue": 0,
- "processing_time": 4900,
- "clusters": [
- {
- "quantity": 40,
- "ids": [
- "GraphHopper GmbH"
]
}
]
}Currently in beta - contact us!
Using the Profiles API you can create routing profiles that are customized to your needs. You can take advantage of
all the modelling options described in the Custom Model section and use the created custom profile (prefix cp_)
with our Routing, Matrix and Route Optimization APIs.
Important notes
- Each custom profile is limited to a geographic area, but within this area there is maximum flexibility for adjusting the profile and you can expect fast response times.
- Currently we only offer this feature to selected customers. If you are interested please contact us.
- This feature is currently in beta status. It is fully functional, but the API might change in the future. Changes will of course be announced well in advance.
- Currently only available for the
carprofile as base. Contact us if you have a different requirement e.g. to customize the bike profile.
A curl example:
curl -X POST -H "Content-Type: application/json" "https://graphhopper.com/api/1/profiles?key=YOUR_KEY" -d '{"bounds":{"bbox":[11.45462,48.00954,11.77322,48.2076]},"custom_model":{"priority":[{"if":"road_class == MOTORWAY","multiply_by":"0"}]},"profile":"car"}'
If you plan to tweak your custom_model frequently it is recommended to first use GraphHopper Maps
(click the gear button), as it is more convenient. When you use your own API key note that this costs 1 credit. To do so append the key like https://graphhopper.com/maps/?key=API_KEY.
Creating custom profiles using the API Explorer
Besides using the /profiles endpoint directly you can also create custom profiles from our API explorer.
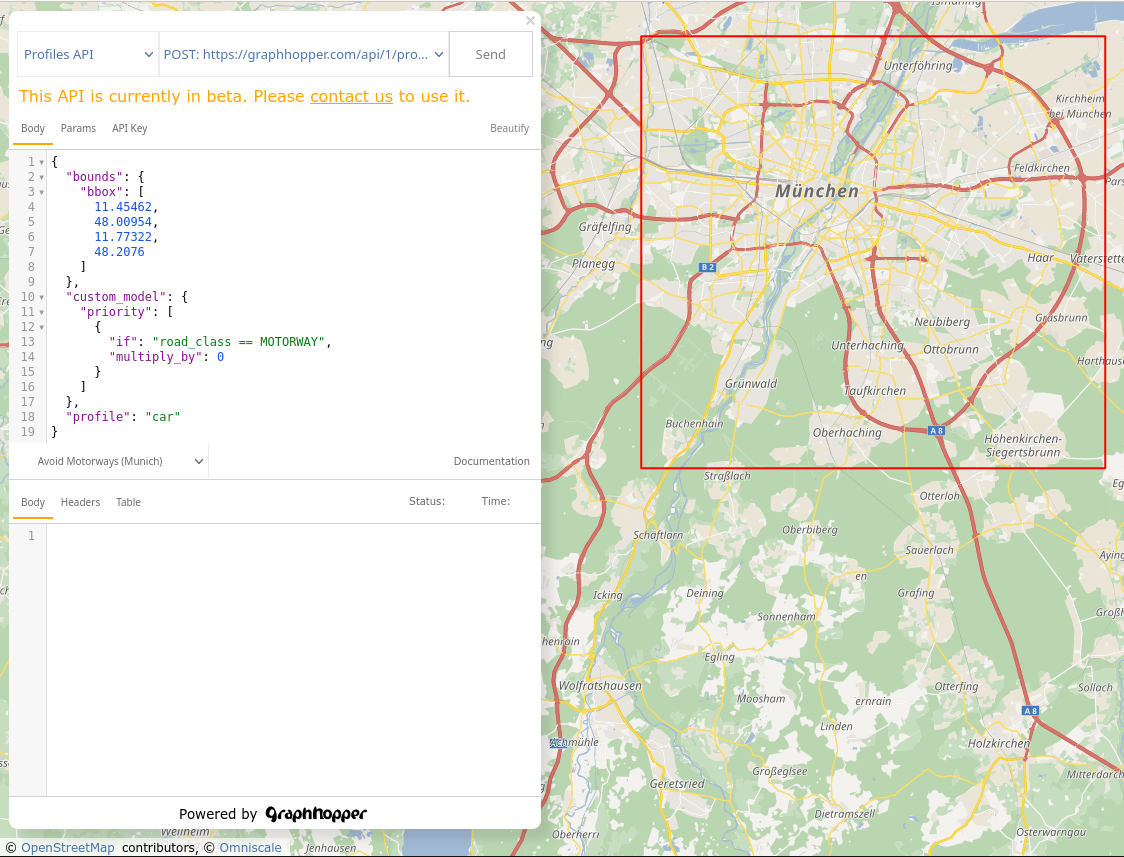
- Visit the API explorer and select "Profiles API" in the first drop down.
- Set your API key with the "API key" button to avoid errors below. If an error occurs we might have to activate custom profiles for your account before you can continue. Contact us.
- Now copy and paste the JSON to create a custom profile into the input window. To get started you can use the already pre-filled example, which will create a custom profile that excludes motorways limited to the Munich area.
- Click "Send". This creates a custom profile. Copy the returned
idfrom the output window (it starts withcp_). - To try this profile out you now change the drop down to "Optimization API". Now pick the first example there and replace "car" in
"profile": "car"(vehicle_typessection) with the profileidand click "Send":
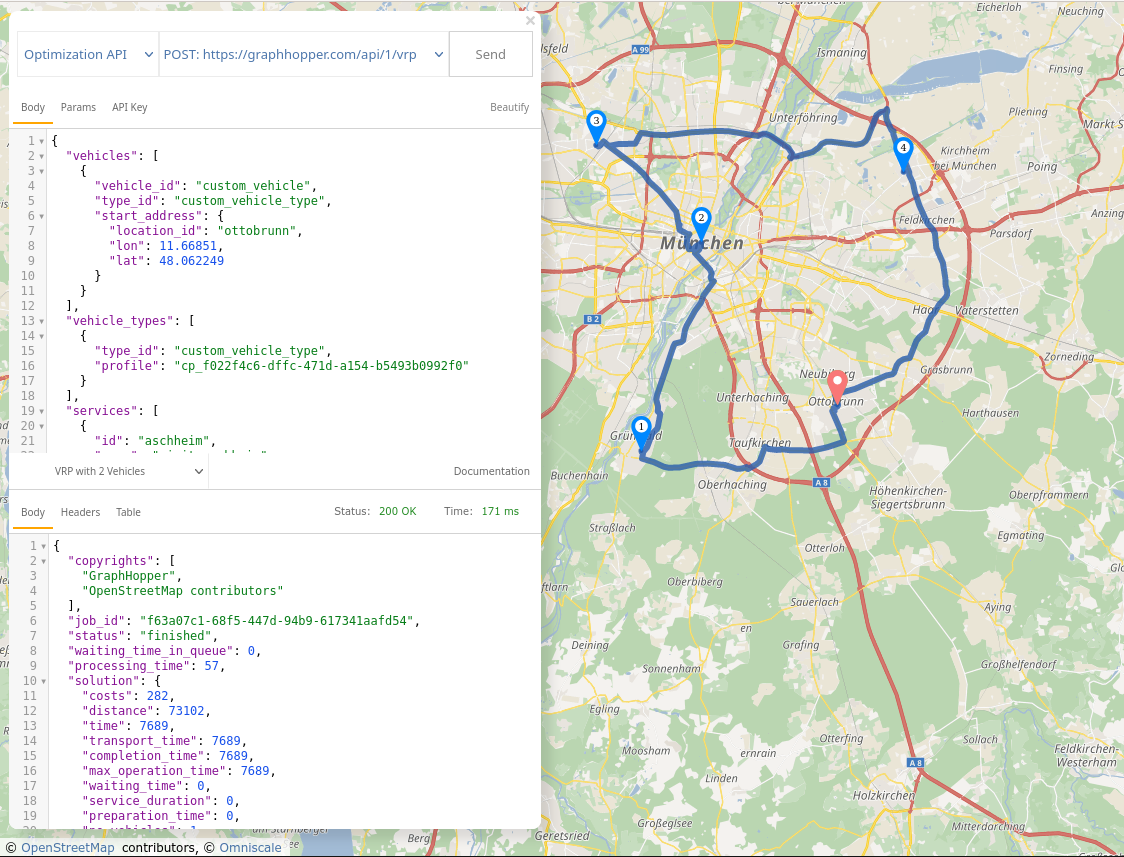
You should now see that the solution no longer uses motorways. Keep in mind that this is a simple example. The custom model language is a lot more powerful than this. Make sure you read the Custom Model section to learn about all the details.
Note that you can use the profile id just as well for the /matrix or /route endpoint. E.g. select "Routing API"
and use the profile id in the request there:
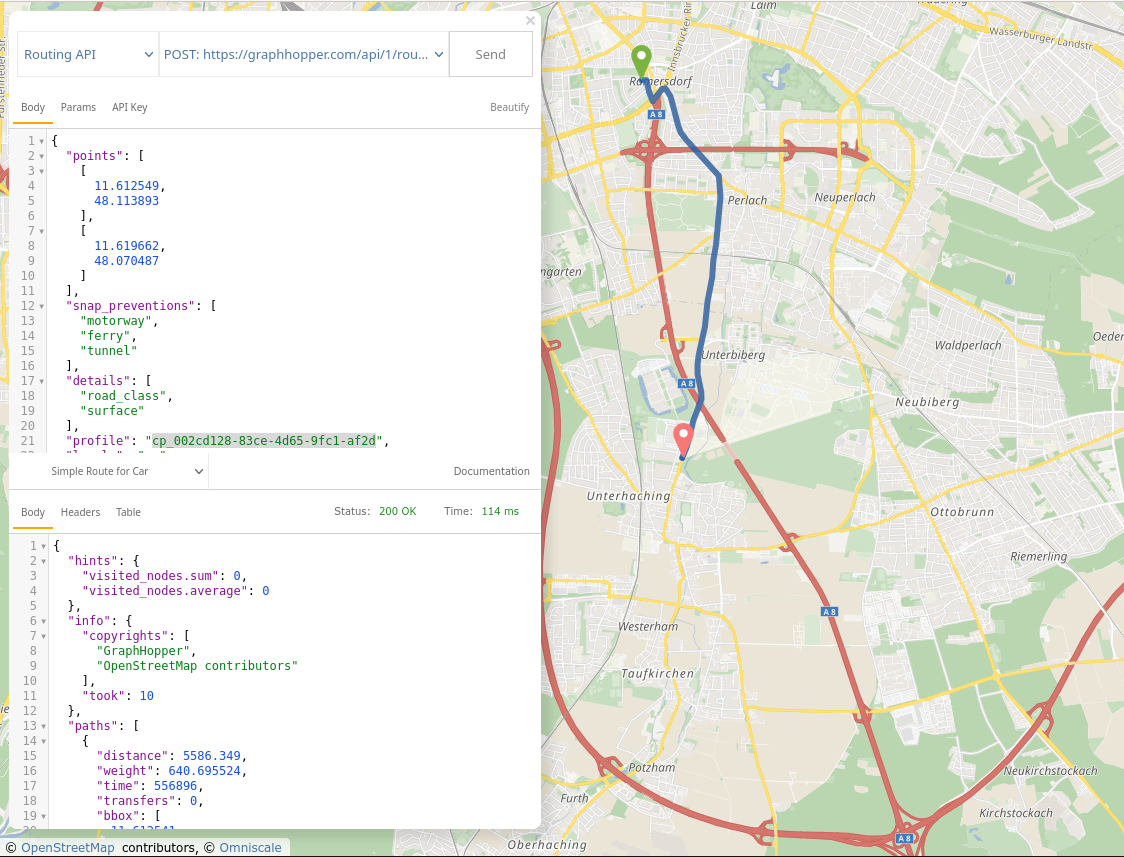
Creating custom routing profiles
Use a POST requests towards https://graphhopper.com/api/1/profiles to create custom profiles
Request Body schema: application/jsonrequired
| profile | string The built-in profile your new custom profile shall be based on. Currently we only support car and small_truck. |
object | |
object (CustomModelForProfile) The custom_model modifies the routing behaviour of the given |
Profile created
- Payload
- curl
- JavaScript
- Python
- PHP
- Ruby
- C#
- Go
- Node.js
{- "profile": "car",
- "bounds": {
- "bbox": [
- 0
]
}, - "custom_model": {
- "speed": [
- { }
], - "priority": [
- { }
], - "distance_influence": 70,
- "areas": { }
}
}- 201
{- "profile": "car",
- "bounds": {
- "bbox": [
- 0
]
}, - "custom_model": {
- "speed": [
- { }
], - "priority": [
- { }
], - "distance_influence": 70,
- "areas": { }
}, - "id": "string"
}Getting your custom profiles
Use a GET request towards https://graphhopper.com/api/1/profiles to get your existing custom profiles
Your profiles
- curl
- JavaScript
- Python
- PHP
- Ruby
- C#
- Go
- Node.js
- 200
{- "custom_profiles": [
- {
- "profile": "car",
- "bounds": {
- "bbox": [
- 0
]
}, - "custom_model": {
- "speed": [
- { }
], - "priority": [
- { }
], - "distance_influence": 70,
- "areas": { }
}, - "id": "string"
}
]
}